LOL! I live below sea level (Groningen, Netherlands).
You can contact mee throught my website http://www.thebigsite.nl if needed. I do have Facebook, Whatsapp, Skype, mail, Google+, etc. if needed.
I can’t find any direct message function on this forum.
. /lib/functions.sh may not have any use here. It contains some pre-defined functions.
To many Dutch people here ![]()
I’m Dutch too… 5 meters below see level ![]()
@alzhao: Great! A bit short, but it looks like to explain the possibility’s clear enough. ![]()
@Guest: Haha! Appearantly a popular product in The Netherlands. ![]()
The interesting fact: We do have a lot of users from Netherlands!!
Well… It’s time for a dutch part on the forum I think. LOL! ![]()
![]() I hope I can keep up with everything!
I hope I can keep up with everything!
BTW the RGB LED you use on the USB port Is that based on the WS2811 LED?
I do not have elektronical knowledge about that and I couldn’t find a recource about it.
You may have a look at the official website: http://blink1.thingm.com/
And the Kickstarter campaign page: https://www.kickstarter.com/projects/thingm/blink1-mk2-the-usb-rgb-led-improved/description
Although it has an secret and undocumented feature to control individual lights on a LED-strip: blink(1) mk2, the USB RGB LED, improved by ThingM » Secret blink(1) feature: Control LED Strips! — Kickstarter
Hmmm I really like to make some design suggestions to GLiNet.
By using rotary encoders and WS2812B RGB LEDs it would be possible to make the AR150 a very powerfull and versatile machine.
The 3 LEDS (or more) can all be controlled by one GPIO And the encoder only uses 2 GPIO’s (or 3 when you also use the push button)
Add more LEDS and an extra encoder and a sky is the limit, make sure the LED GPIO is on a header for external connection and even more LEDS can be controlled.
@frietpan, so you suggest to make something colorful and fun.
In here NeoPixel 5050 RGB LED with Integrated Driver Chip - 10 Pack : ID 1655 : $4.50 : Adafruit Industries, Unique & fun DIY electronics and kits I saw some interesting projects. Your suggestion is not technically difficult, the only thing is to think about how to make it fun. Any detailed suggestion on the final appearance of the product?
I have several idea’s on the apepearance. For several different usage scenario’s
A few years ago i made a arduino moodlight mooderboard
Now with Jeroen’s project that now is far more simple to build with the MS2812B LED’s ![]() and can do MUCH more.
and can do MUCH more.
This is where the rotary encoder comes in play.
So the most simple idea would be a ‘Moodlight’ with WIFI. ![]() When in idle mode it moods away into the future…
When in idle mode it moods away into the future…
But when there is incoming traffic it goes RED, outgoing Green, WIFI guest Yellow, etc.
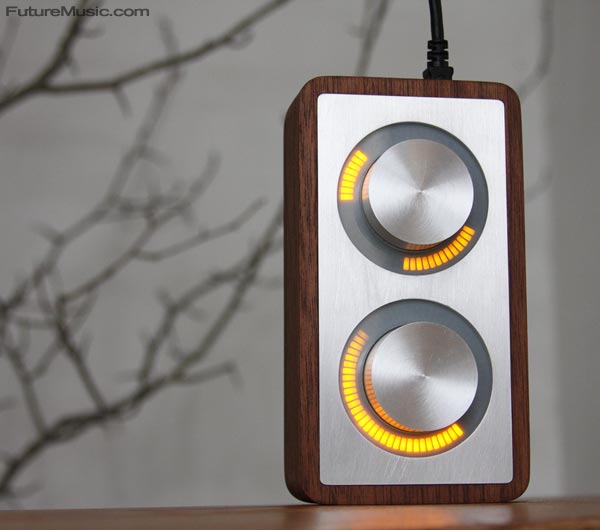
One idea would be a ring of 10 MS2812B leds around the encoder http://www.futuremusic.com/news/images/monome-arc.jpg
something like that, but then in RGB. ![]() then a user can send R G B values over the net. Or audio volume settings, fan speeds, servo positions, x-mas tree colors? whatever… cyberspace is the limit?
then a user can send R G B values over the net. Or audio volume settings, fan speeds, servo positions, x-mas tree colors? whatever… cyberspace is the limit?
Link many of these devices over the net etc etc… this is only the beginnig…
seems interesting. So the final outcome really depends on the creator’s aesthetic appreciation …
My idea was to include a sort of RGB LED-ring on the bottom of the GL-AR150. The light should be lit / viewable on each side of the router.
Also I would like to see 2 instead of 1 USB-port. For me it’s fine if only one of them is power controllable through GPIO 6.
I made a drawing based on these idea’s and the rotary controller of frietpan. As you can see the idea is a small ring (driven by 1 RGB led) with the rotary controller in the middle of it. Also I like the idea of having the option to let the indicator lights on top burn different colors. For example red/green or RGB.

You could name it the GL-AR150c. The “c” for “color”. ![]()
Or the “c” for “community” (inspired by the community). ![]()
Also it would be nice to have a bit more space above the pin headers. I wanted to leave the header cables on the pin headers while I close the case, but then the case won’t fit. ![]()
Nice drawing. Rotary controller maybe easy. You can just use the whole of antenna or drill another whole to install one.
The RGB LED ring is difficult, as it needs to replace the bottom cover and make a new mold. 2USB would be difficult to fit in the little PCB, as one USB hub interface is needed.
But these are cool ideas. Let’s see if we can make something in the future.
Instead of a LED ring on the bottom you could add a kind of transparant piece on the top of the casing. I advise to let it not be a total clear transparancy thing.
If a rotary controller is small enough you also could place it an antenne hole indeed.
For the reading of the rotary controller state with Python or bash I don’t have any idea how to that since I do not have the knowledge of adding a rotary controller to my GL-AR150 and also not enough programming experience.
Seems i have missed a few notifications…
I expect a few rotary encoders in the mail this week, Jeroen I could send one to you to experiment with.
The encoder also has a push switch. So you could then use it to select a value, and then push the rotary to ‘enter’ that value
Putting the rotary on the side is a good alternative. Maybe it makes sense to move the antenna connector to the other side then the plastic space pin inside is also less of an issue.
My coding knowledge is also very limited. I so if there are coding wizards reading along, then please share the thoughts.
Rotary encoders arrived today. turns out they only have 2 pullups, and no debouncing caps, so i hope that will not cause too much trouble. I have nearly no programming skills so i will soon run into issues.


That’s is what it is…
So we need +, GND, and 2 GPIO’s for CLK, DT. For SW we can use another GPIO, this is a pushbutton when you press on the shaft of the encoder.
- is going to be connected to 3v3. (I will use a RED wire for this)
GND to GND (this is going to be a BLACK wire)CLK to GPIO16 (BLUE)
DT to GPIO17 (YELLOW)
SW use GPIO 14 (GREEN)

Now the hard part, …the programming. Who can help me to make a good start?
If someone is interested to tinker along I can send you an encoder, some header pins and jumper wires.
With the PCB the encoder consumes more space then I expected so it has to go somewhere in the centre of the top of the enclosure.