I got a few DMs on another platform for setup instructions for the Beryl AX with AGH and VPN turned on. Thought I would post them here too for anyone struggling to get their router going. Here is my process to fully setup my Beryl AX, with NordVPN and AdGuard Home enabled, and no DNS leaks. The current stable firmware, v4.8 leads to DNS leaks when using AdGuard Home with a VPN on the Beryl AX. The folks at Gl.iNet have been working to address that. As a result, the v4.8.1 snapshot on their download page, has fixed the issue. Hopefully, they release a stable version soon.
Let's start from scratch. I am going to take it for granted that you:
- know how to log into the router and have now logged into the router admin page
- have been able to connect to the internet, establish your WiFi connections and have your clients (i.e. phones, laptops, Roku etc.) connected to your network.
These instructions are purely to use the Beryl AX as a client (not as a server). I mention in the title that these instructions are for NordVPN, but they will work for everything else besides the VPN portion (if you intend to use another one like Mullvad). However, that process should be similar to the one for NordVPN (up until the login details for your particular VPN provider).
CONFIGURING NORDVPN
You can choose OpenVPN or WireGuard protocols. OpenVPN is an older protocol that is trusted, but is slow. WireGuard is a newer one with very few lines of code and is thus leaner. It is lean and secure and I would recommend using this (unless you have reasons to use OpenVPN). I actually configured both, but mainly use WG.
OpenVPN
- Click on 'VPN' and then 'OpenVPN Client'
- Click on the 'NordVPN' icon
- It will ask to enter the service credentials. Note that this is NOT your username and pw that you use to log onto NordVPN. So how do you get these?
- Log into your NordVPN account and click on 'NordVPN' on the left sidebar. Scroll down the page and click on the 'Set up NordVPN manually' hyperlink
- Click on the 'Service credentials' tab and then on 'Verify email'
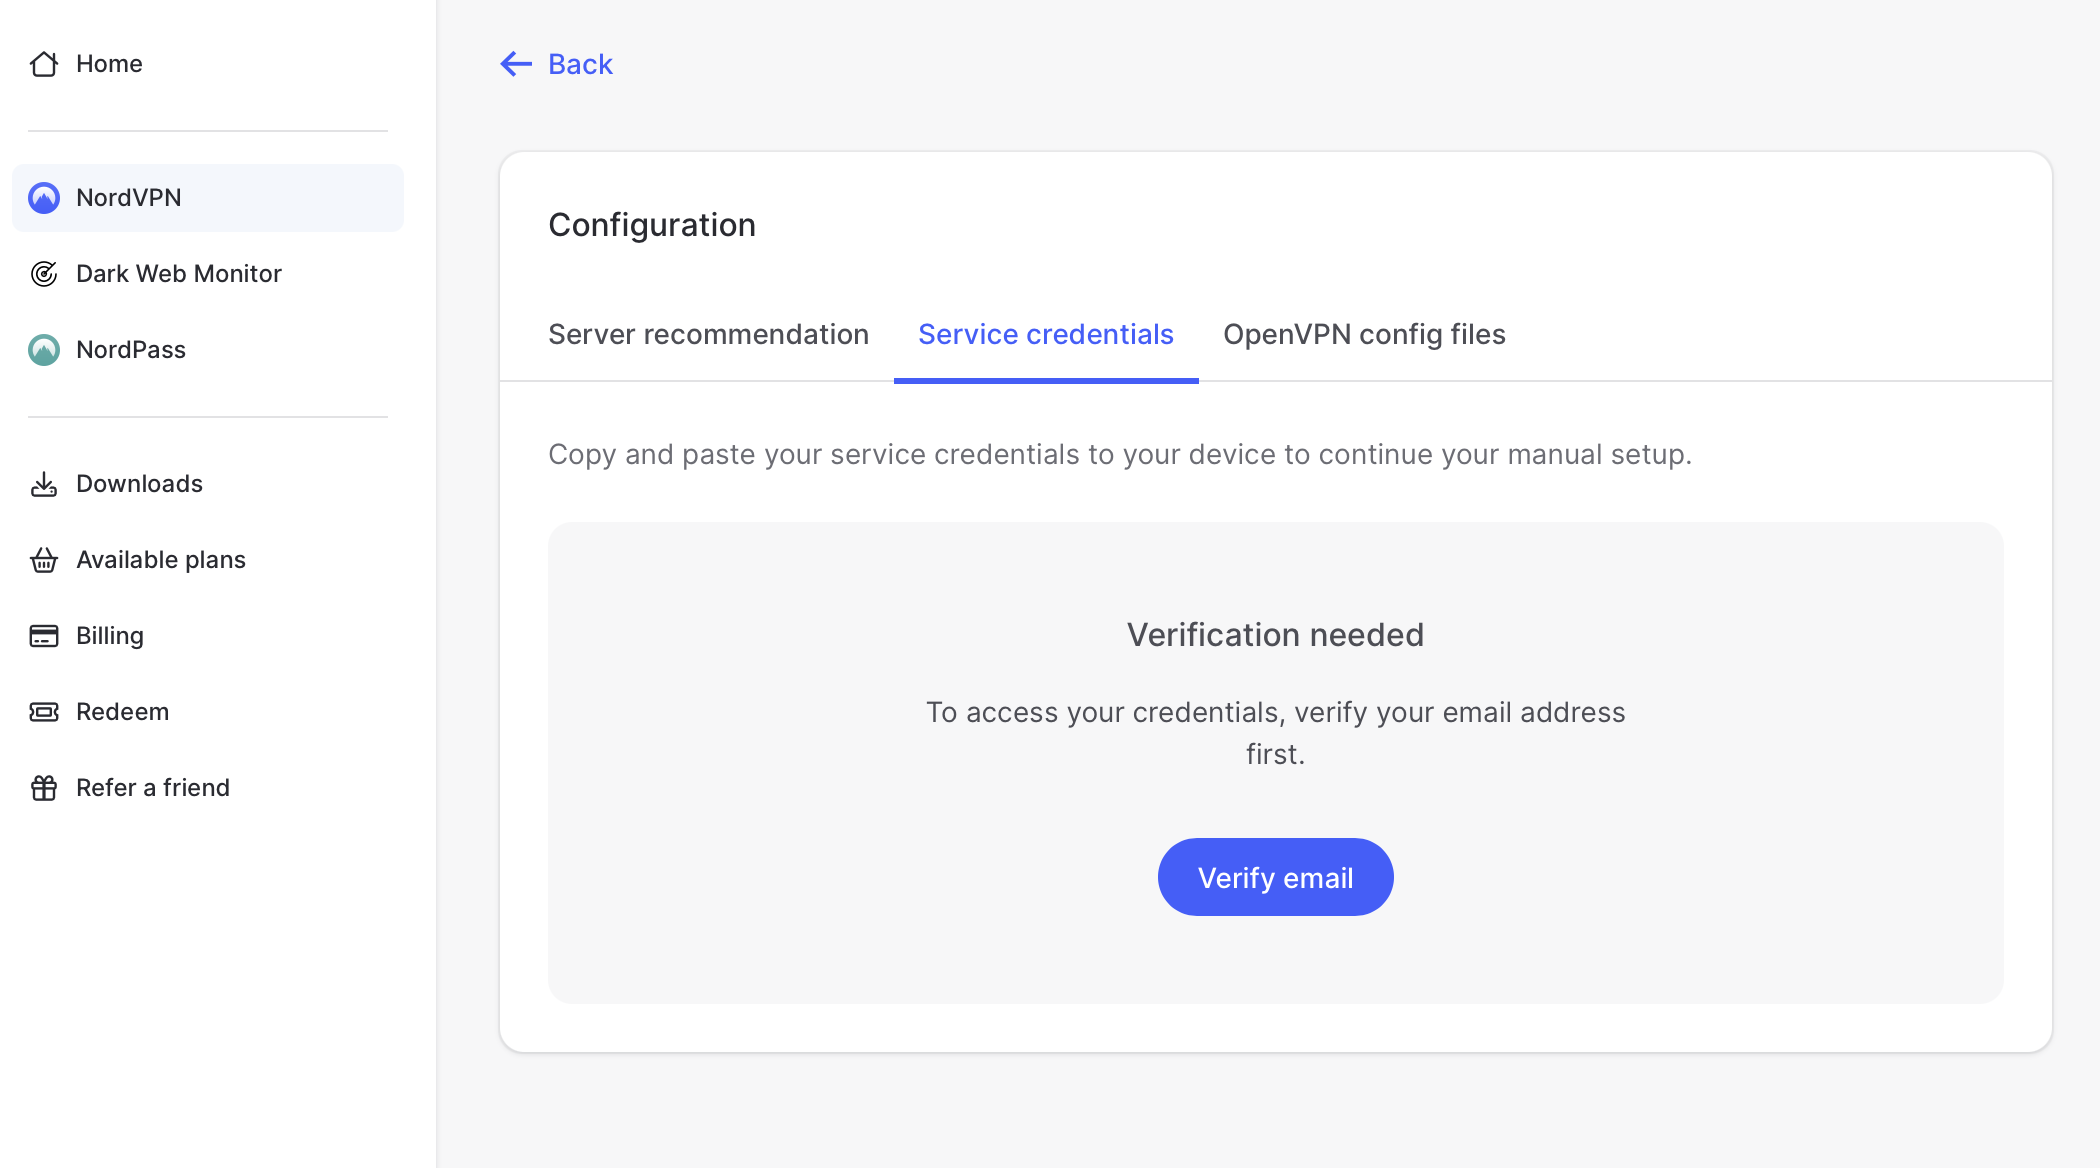
- You will be taken back to the verification page, where you will need to enter the code sent via email to you.
- Once back in NordVPN, you will be able to copy your credentials. Copy the Username and Password and drop them into the credentials for OpenVPN on the Beryl and hit 'Save and continue'
- From there, select either UDP, TCP or both and then select the server locations you would like. Best to choose servers closest to you. Once you have selected the server locations, hit 'Apply'. NordVPN will then retrieve the configuration profiles for those selected servers
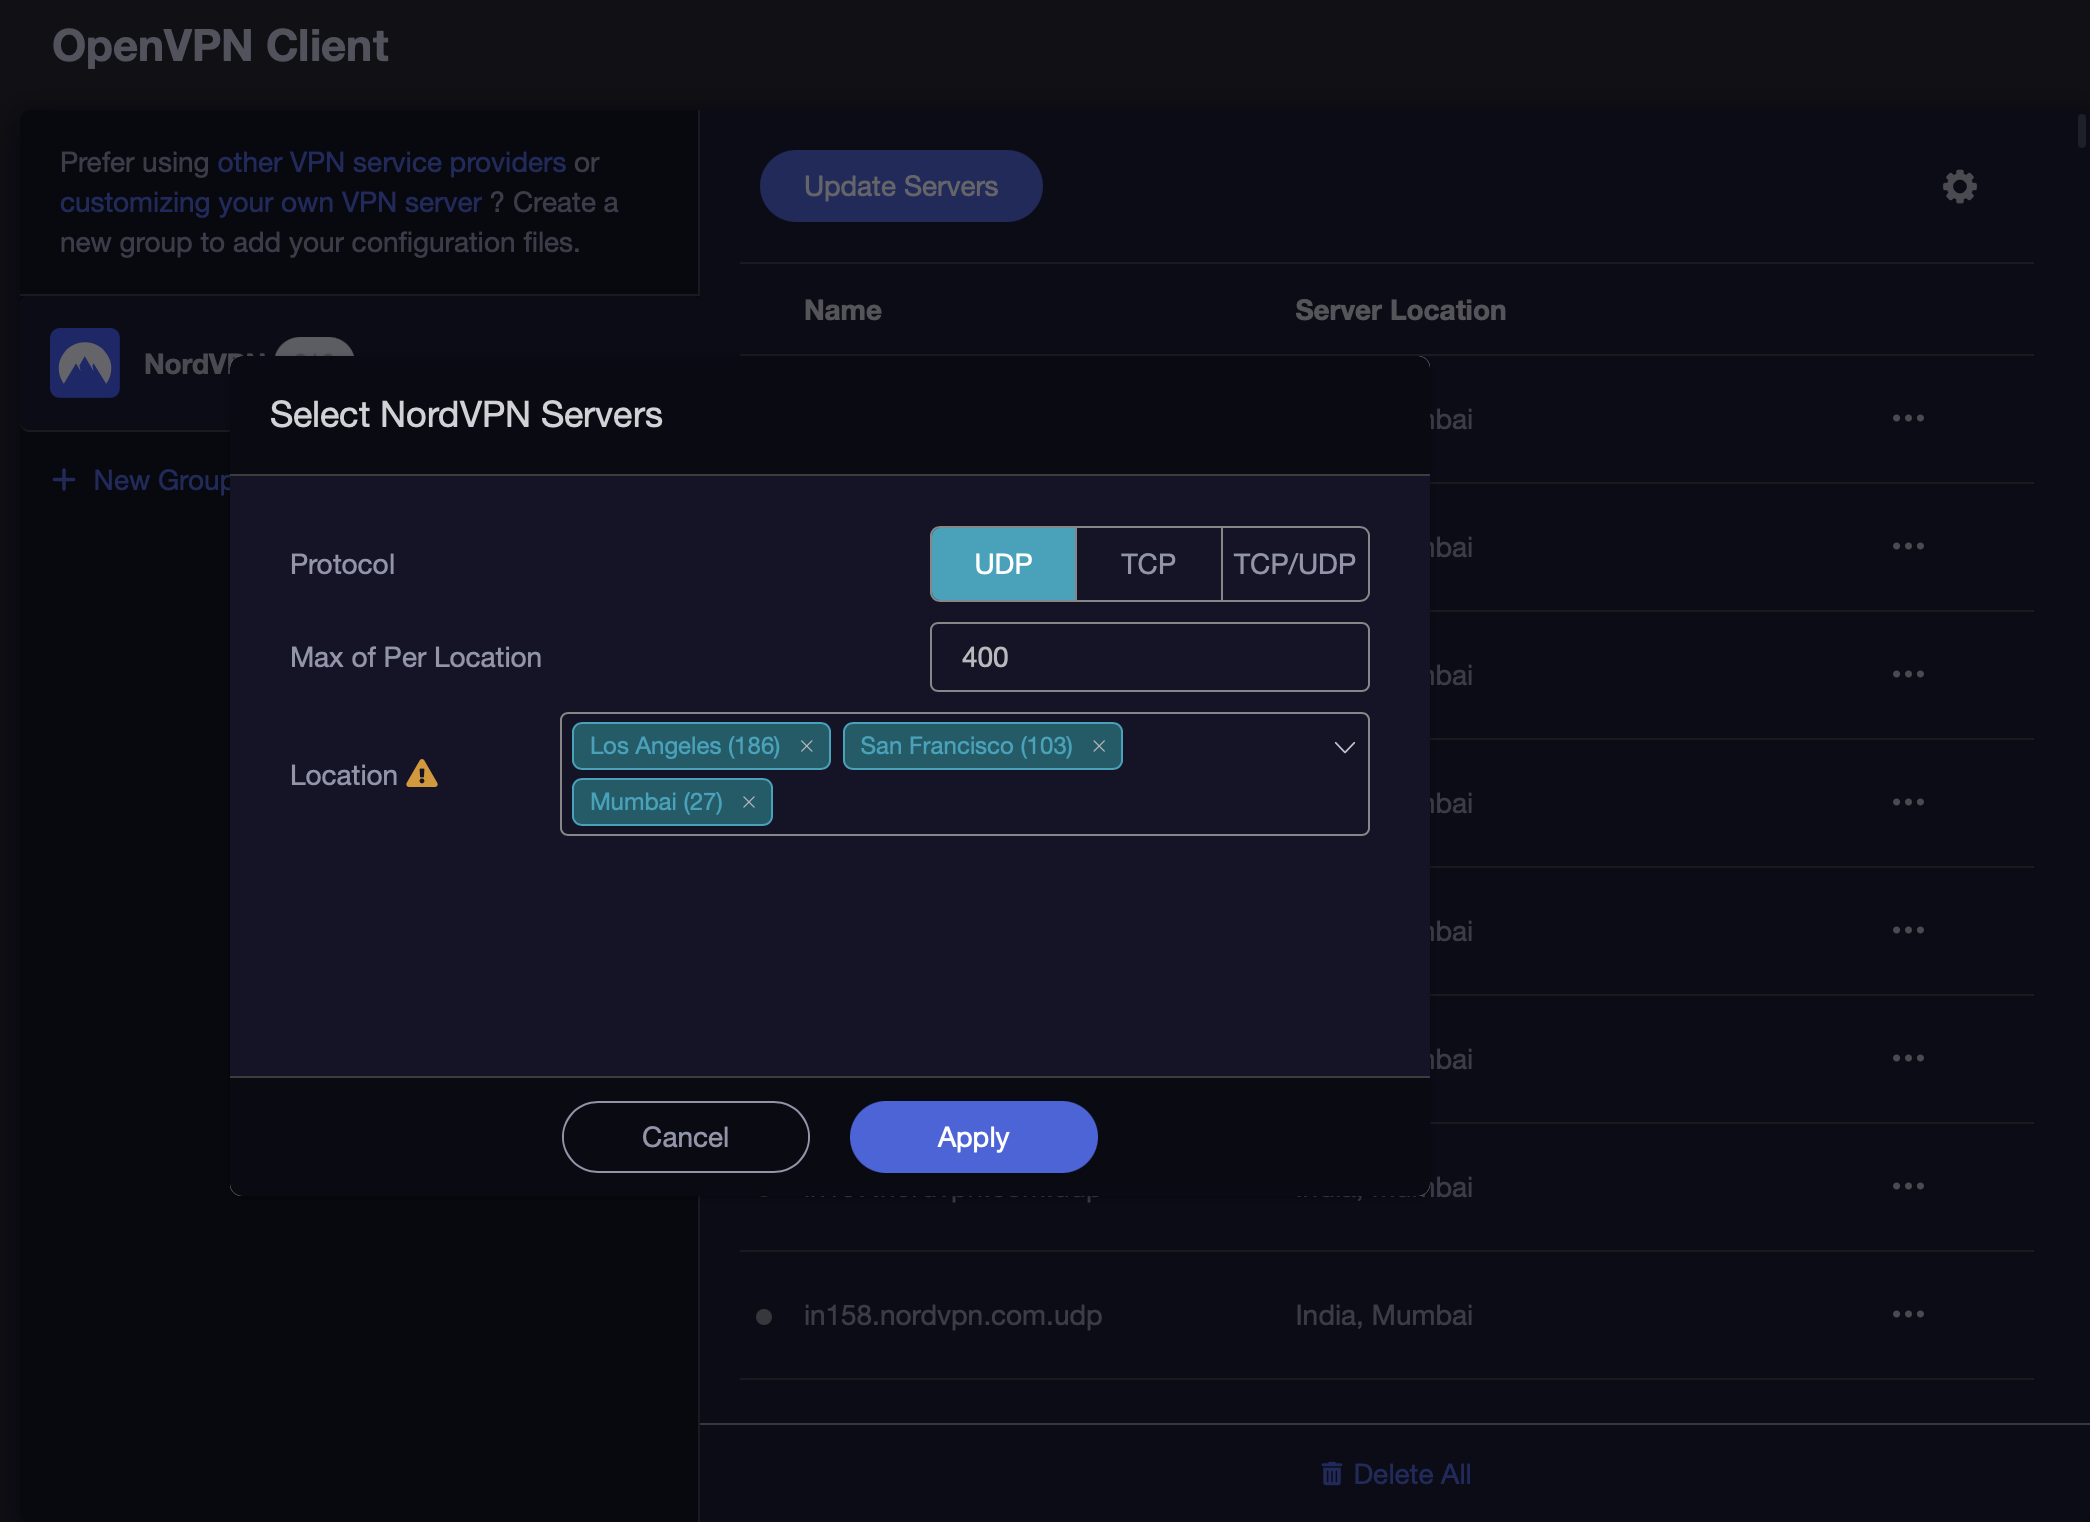
- Once the list populates, scroll down until you find the server you want to use (NordVPN also has a 'Server recommendation' tool that is on the same page as the credentials). Once you have found a server you like, click on the three dots on the right side of the server information, and click 'Start'
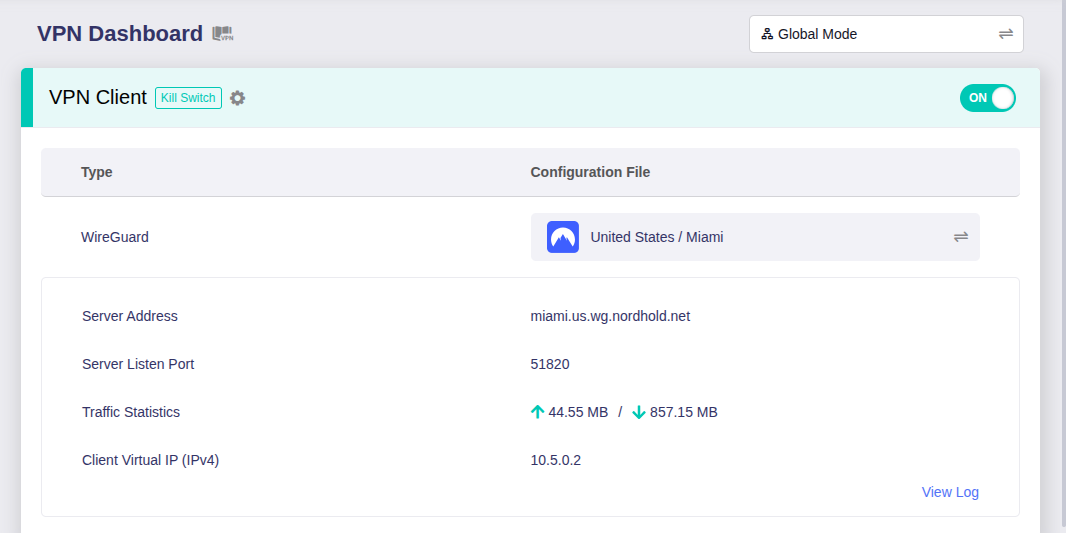
- NordVPN will then start the server and you will be able to view the server details on the VPN dashboard
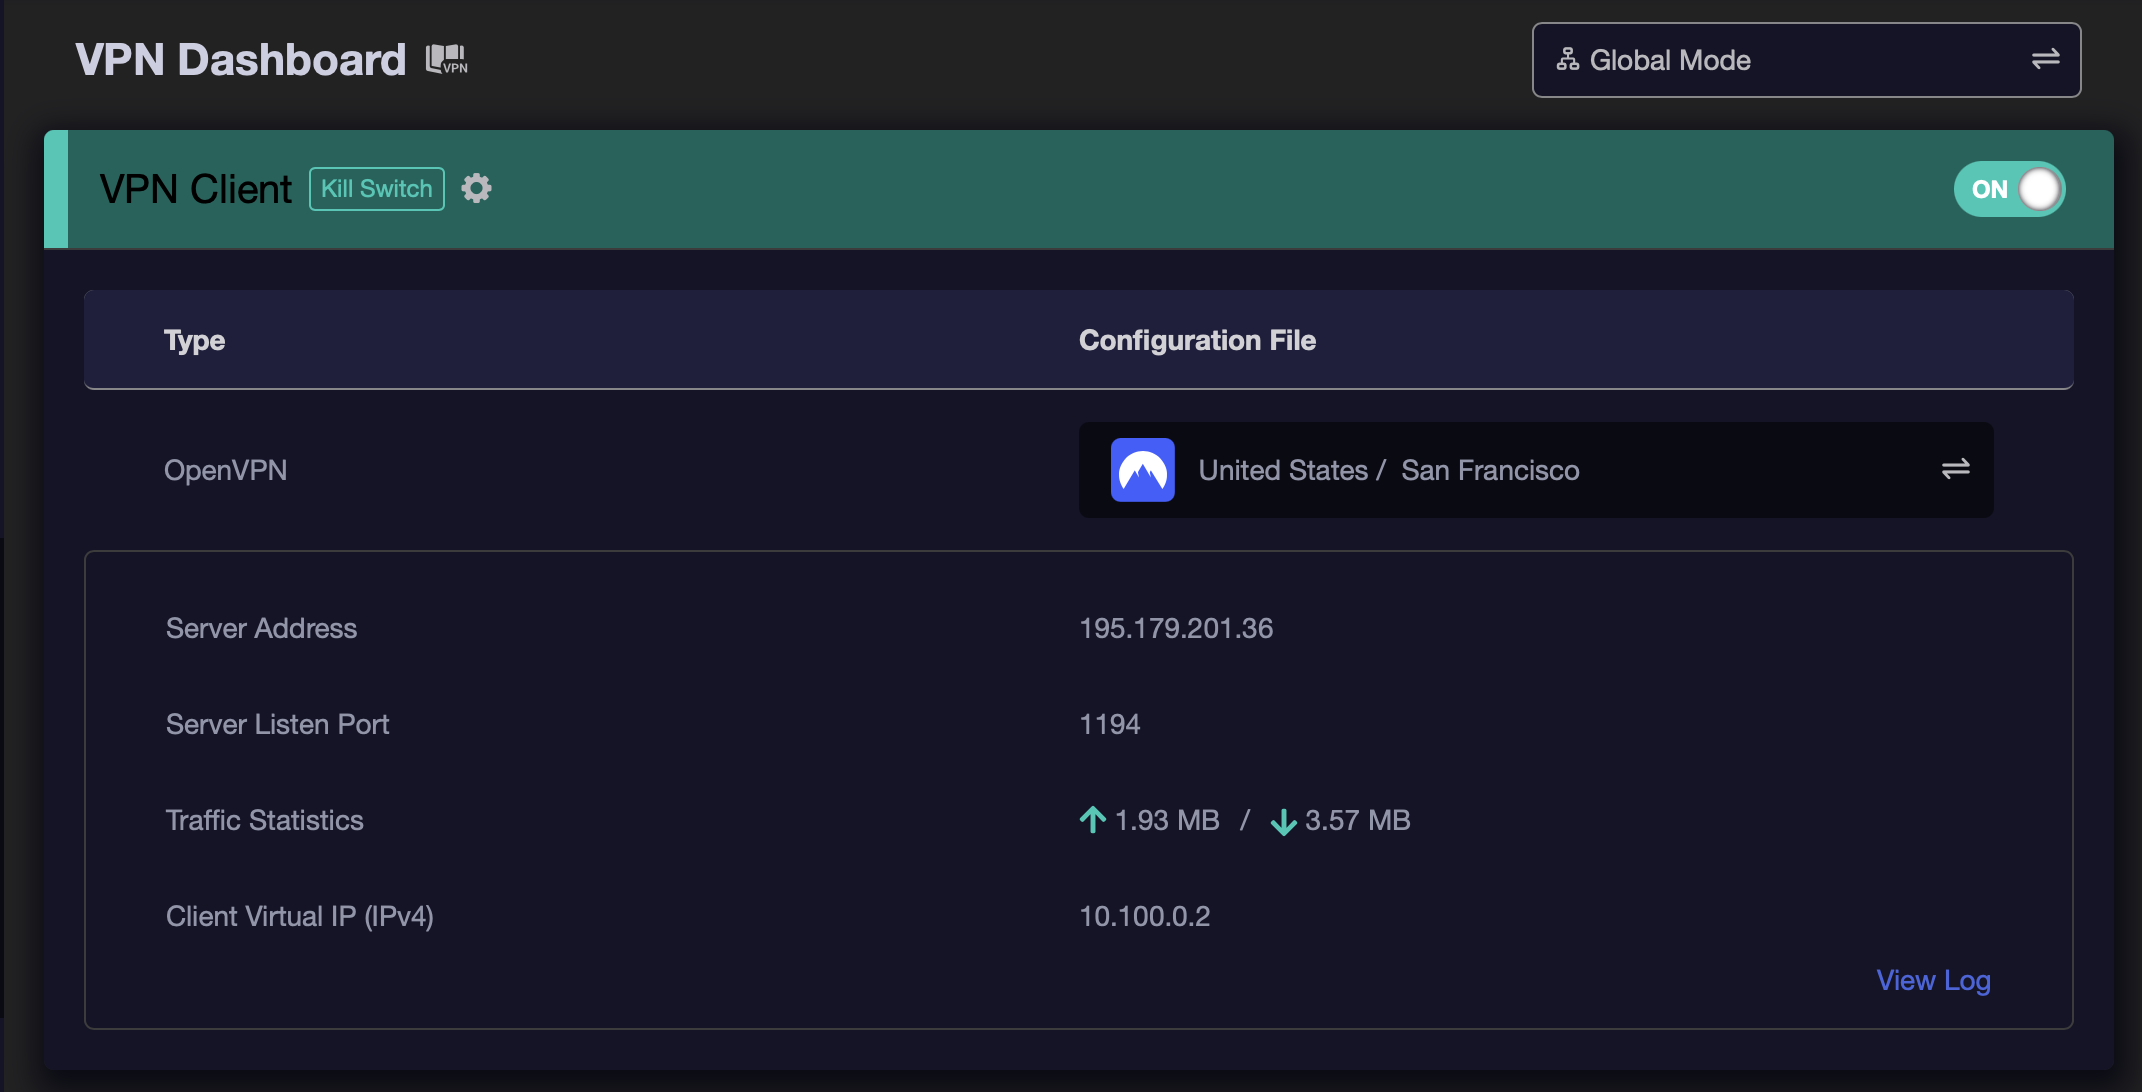
By default, you should be in Global Policy mode (i.e. all traffic has to flow through the selected VPN). On the VPN dashboard, select the cogwheel to the right of 'VPN Client' and turn on the kill switch (IP Masquerading should be on by default).
That is all you need to do for OpenVPN. I am only providing settings for a 'Global Mode'. You can enable the 'Policy Mode' where you can configure different VPN tunnels based on policy (i.e. you can have your Laptop, Phone go through a VPN Tunnel in the US, while your Roku can go through one in India, so that you can play the local media from India via Netflix etc.)
WireGuard
WireGuard is similar to OpenVPN.
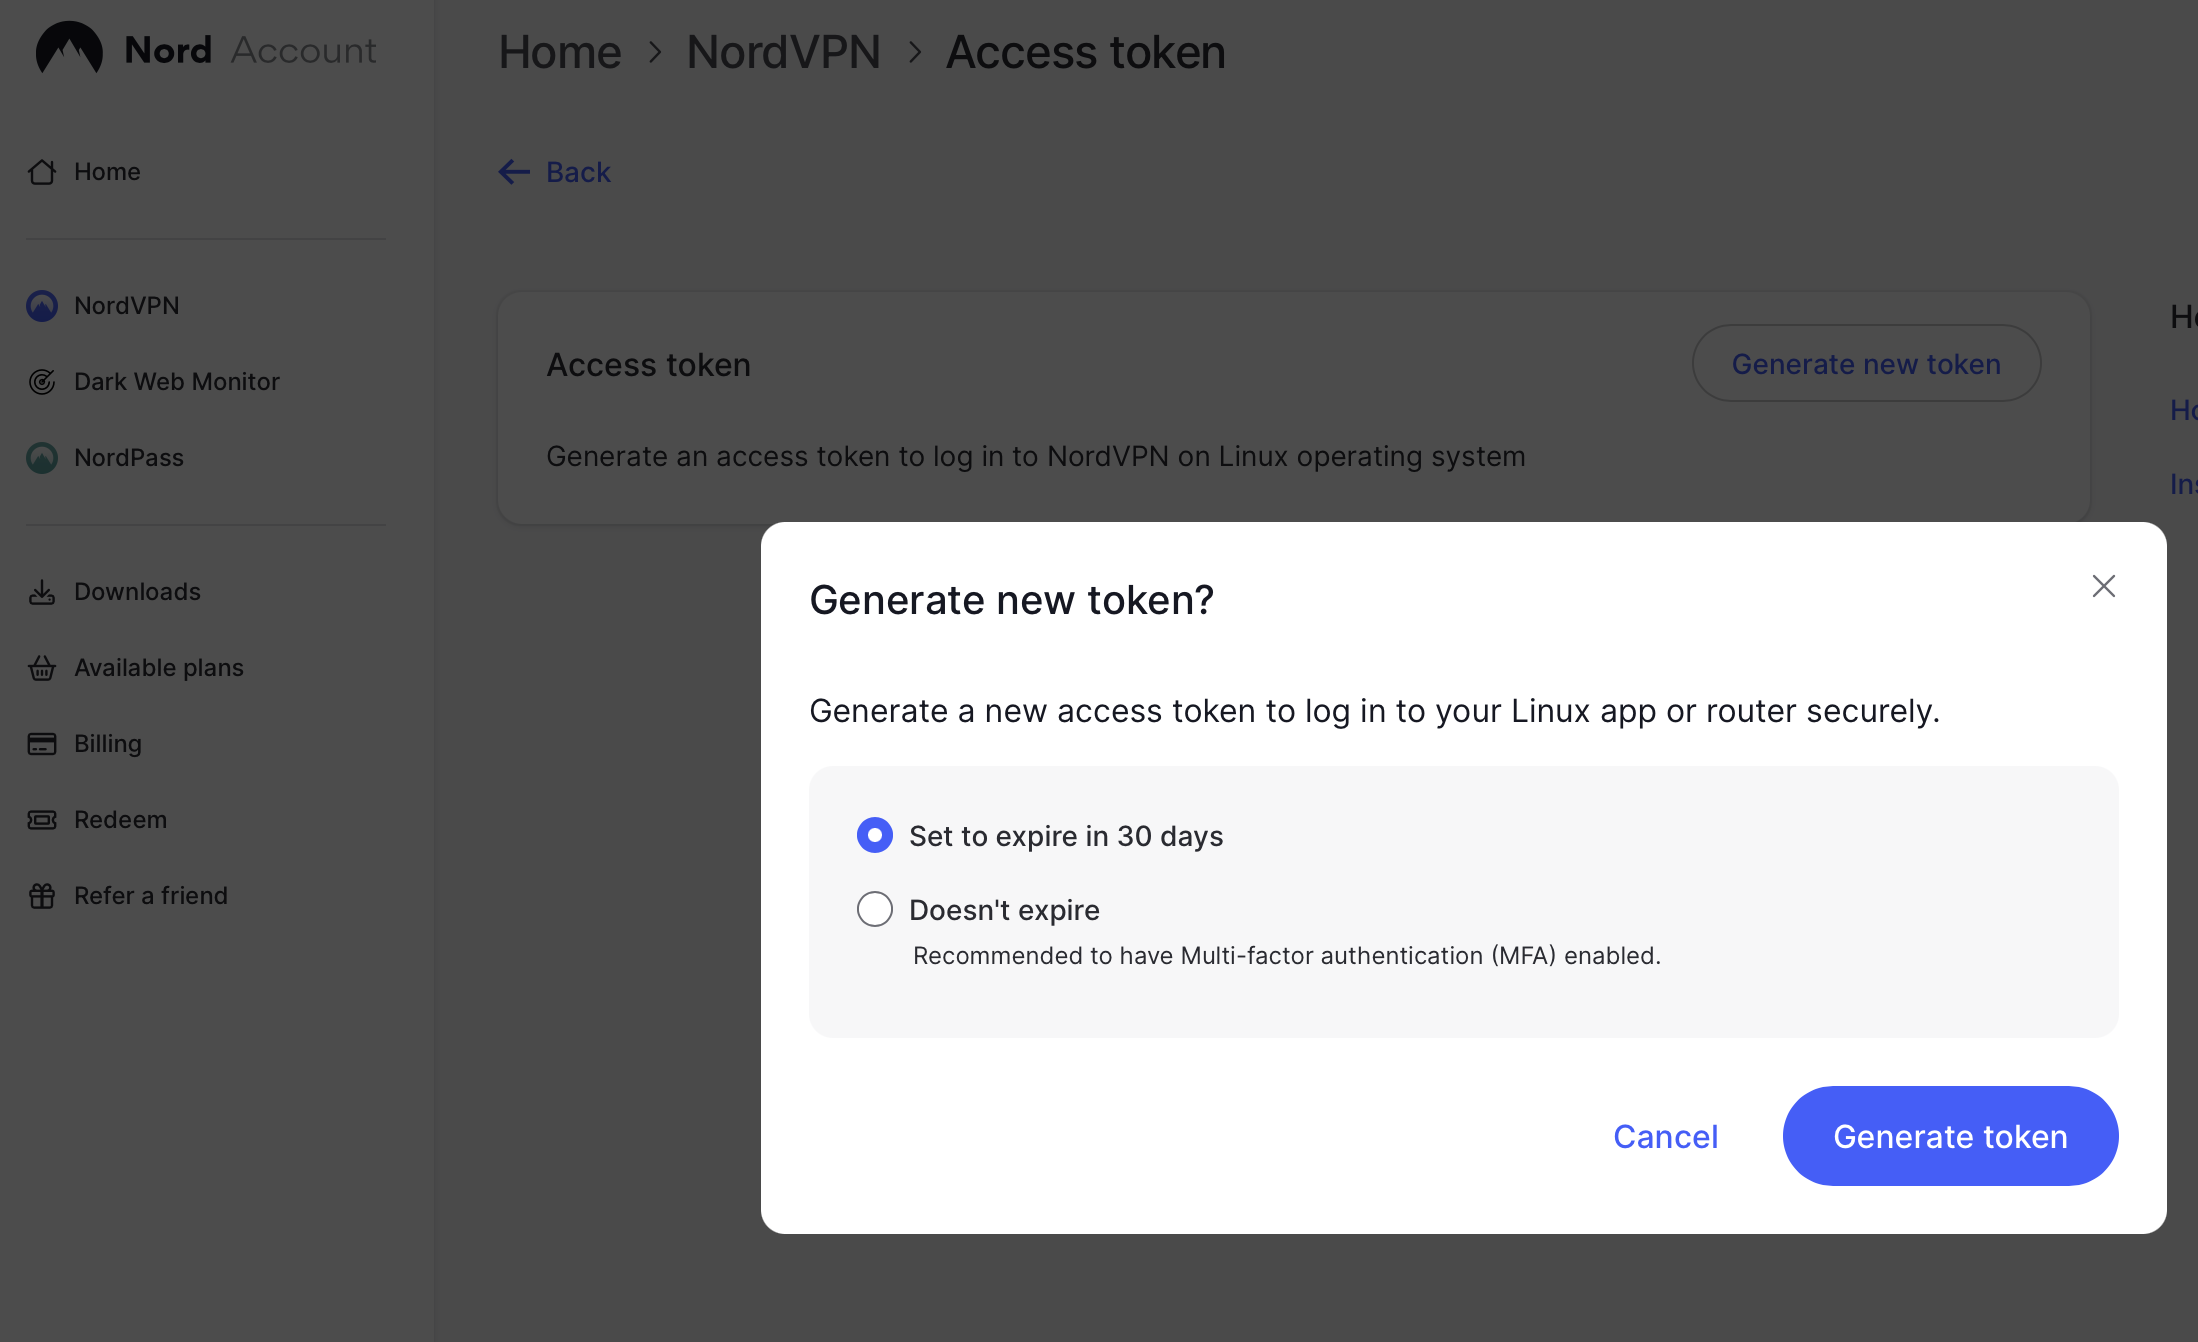
- Once you have logged into your NordVPN account, then click on the 'NordVPN' link on the left sidebar and then on the page that loads, scroll all the way down, to 'Get Access Token'. You might need to verify your email again. Once the page loads, click on 'Generate new token' and choose the length of token validity. If you choose 'Doesn't expire' make sure you have MFA enabled in NordVPN to prevent unauthorized access.
- Copy the token and then on the Beryl AX, click on 'WireGuard Client', choose 'NordVPN' and paste the token into the 'Token' box. Hit 'Save and Continue'
- In the next window that pops up, choose the servers you want to use and then hit 'Apply'
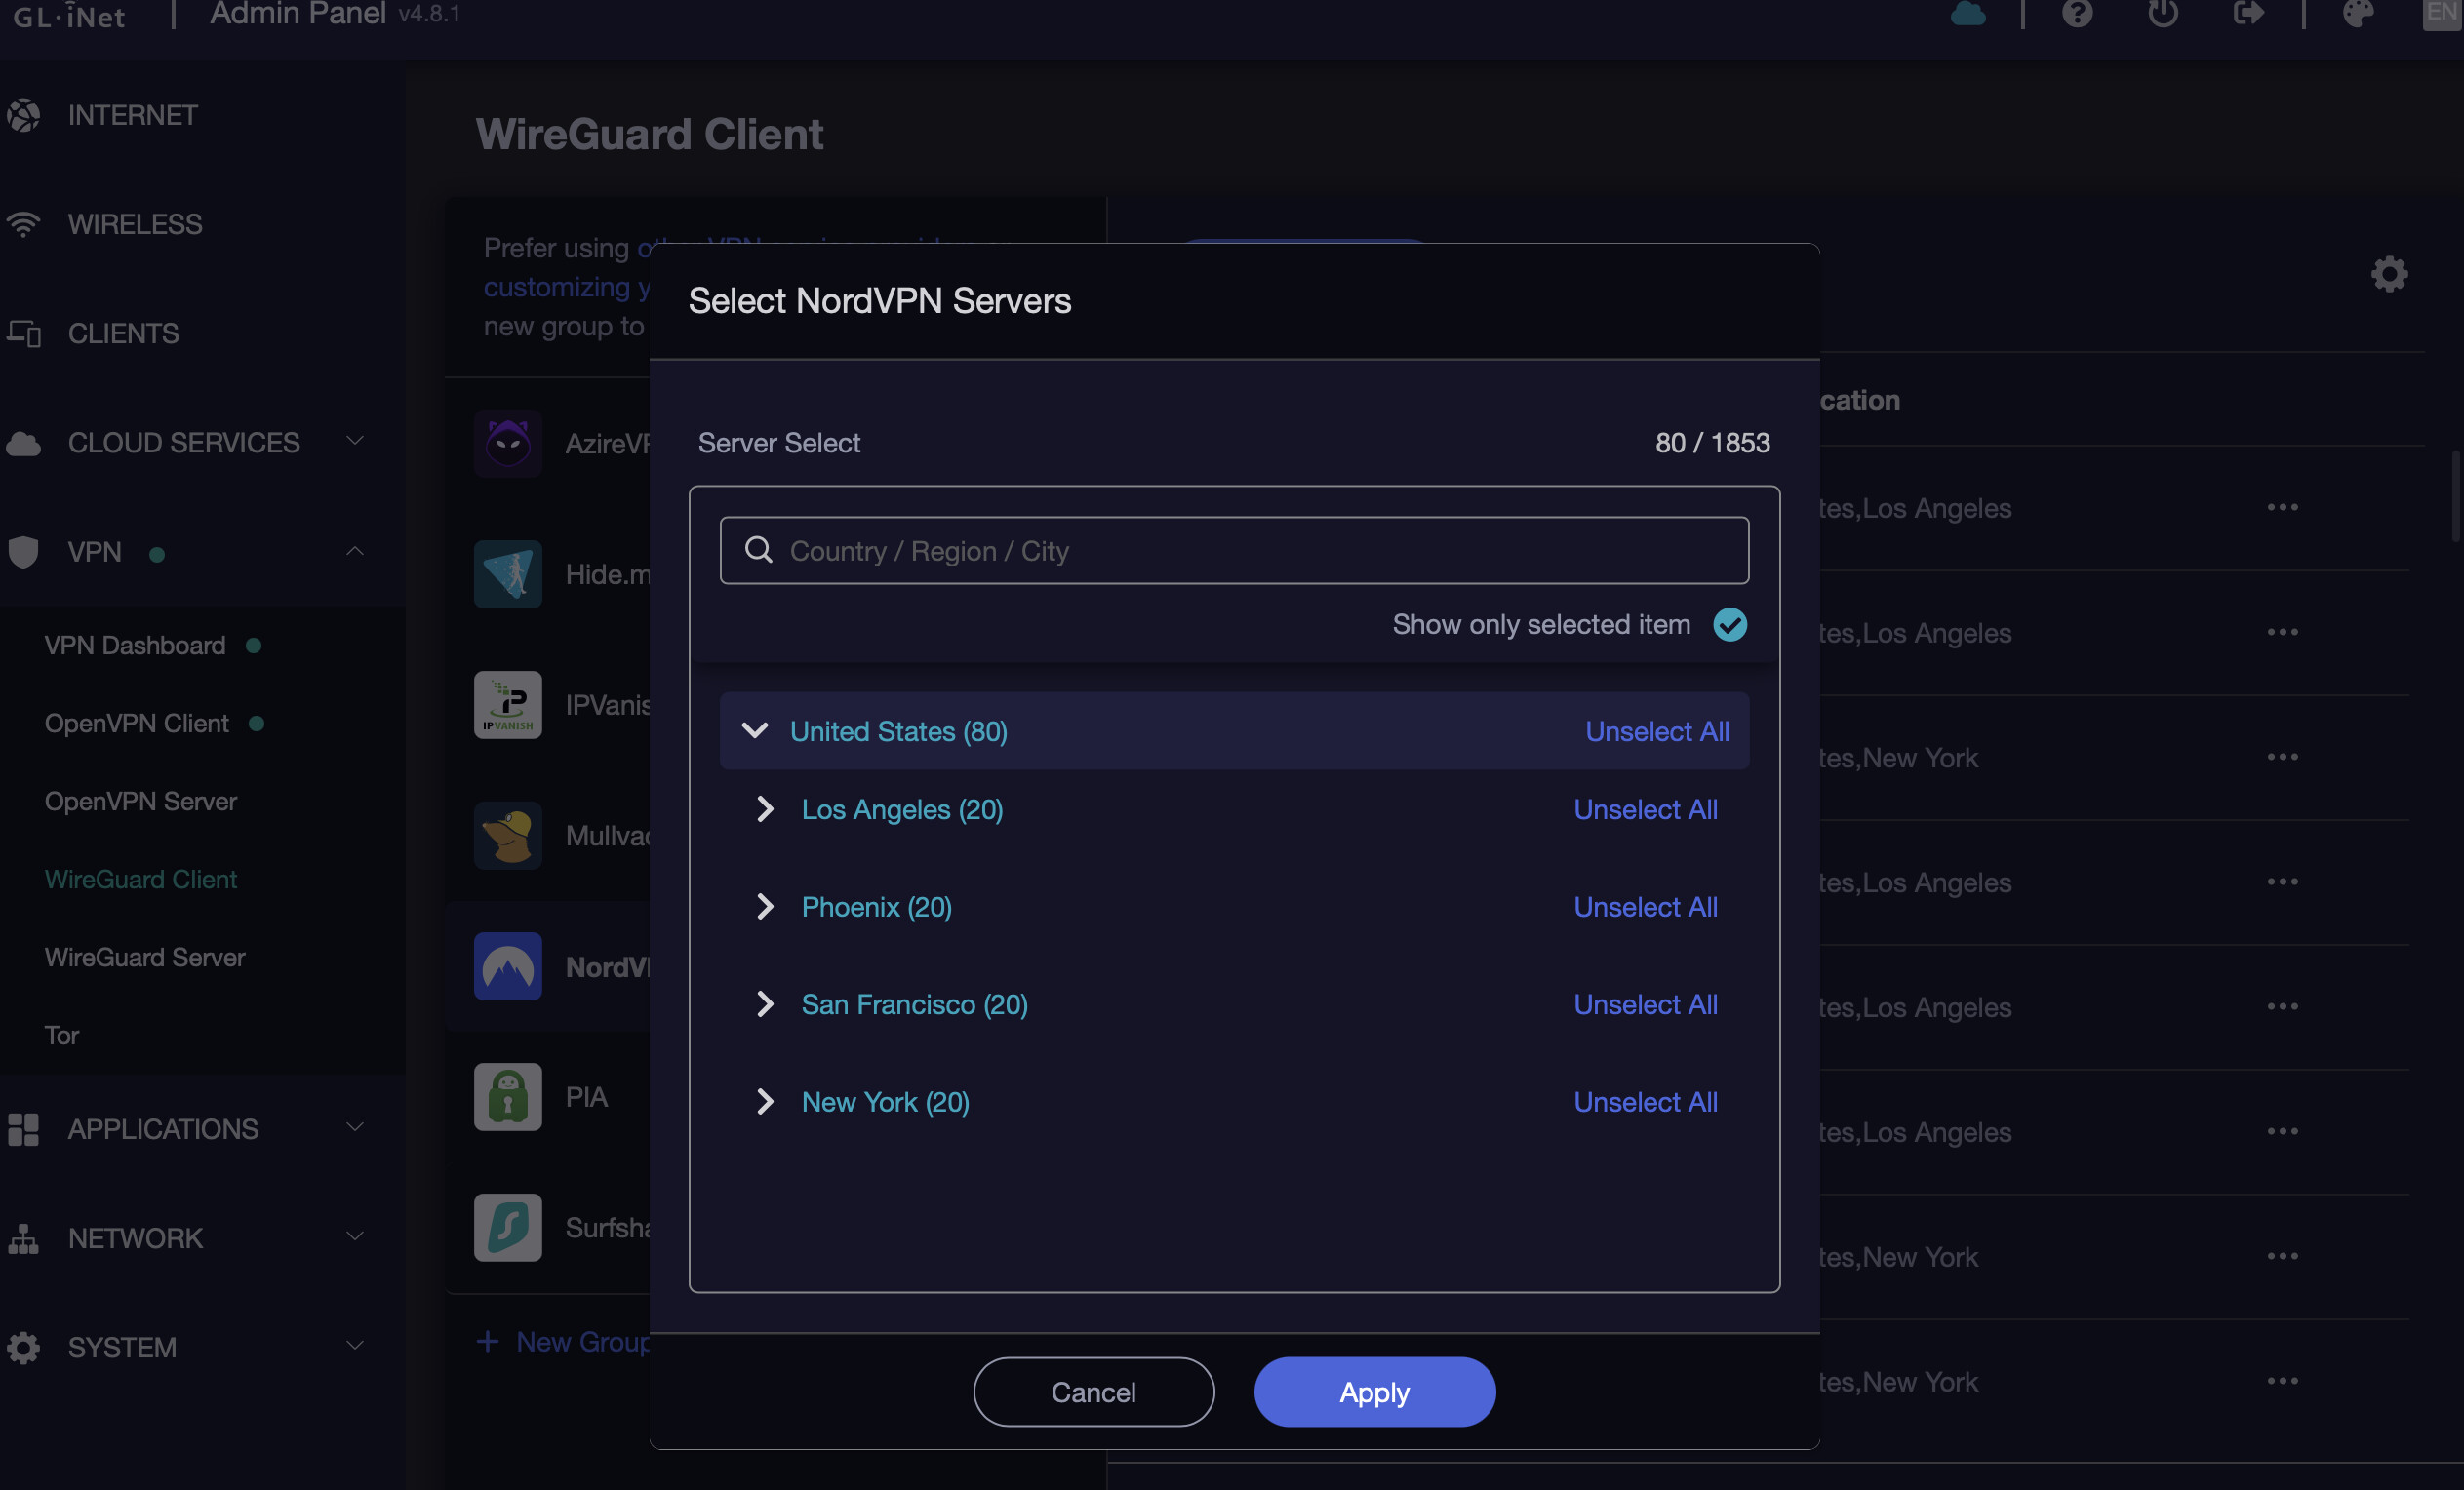
You will now see the list of selected servers. As before, you can select one you like and start it. In the older versions of the firmware, you had to first stop any running server to start a WG one. But now you should be able to just hit start on the selected WG server, and it should stop any running server and start this one. Like before, check that the 'Kill Switch' is turned on to prevent leakage.
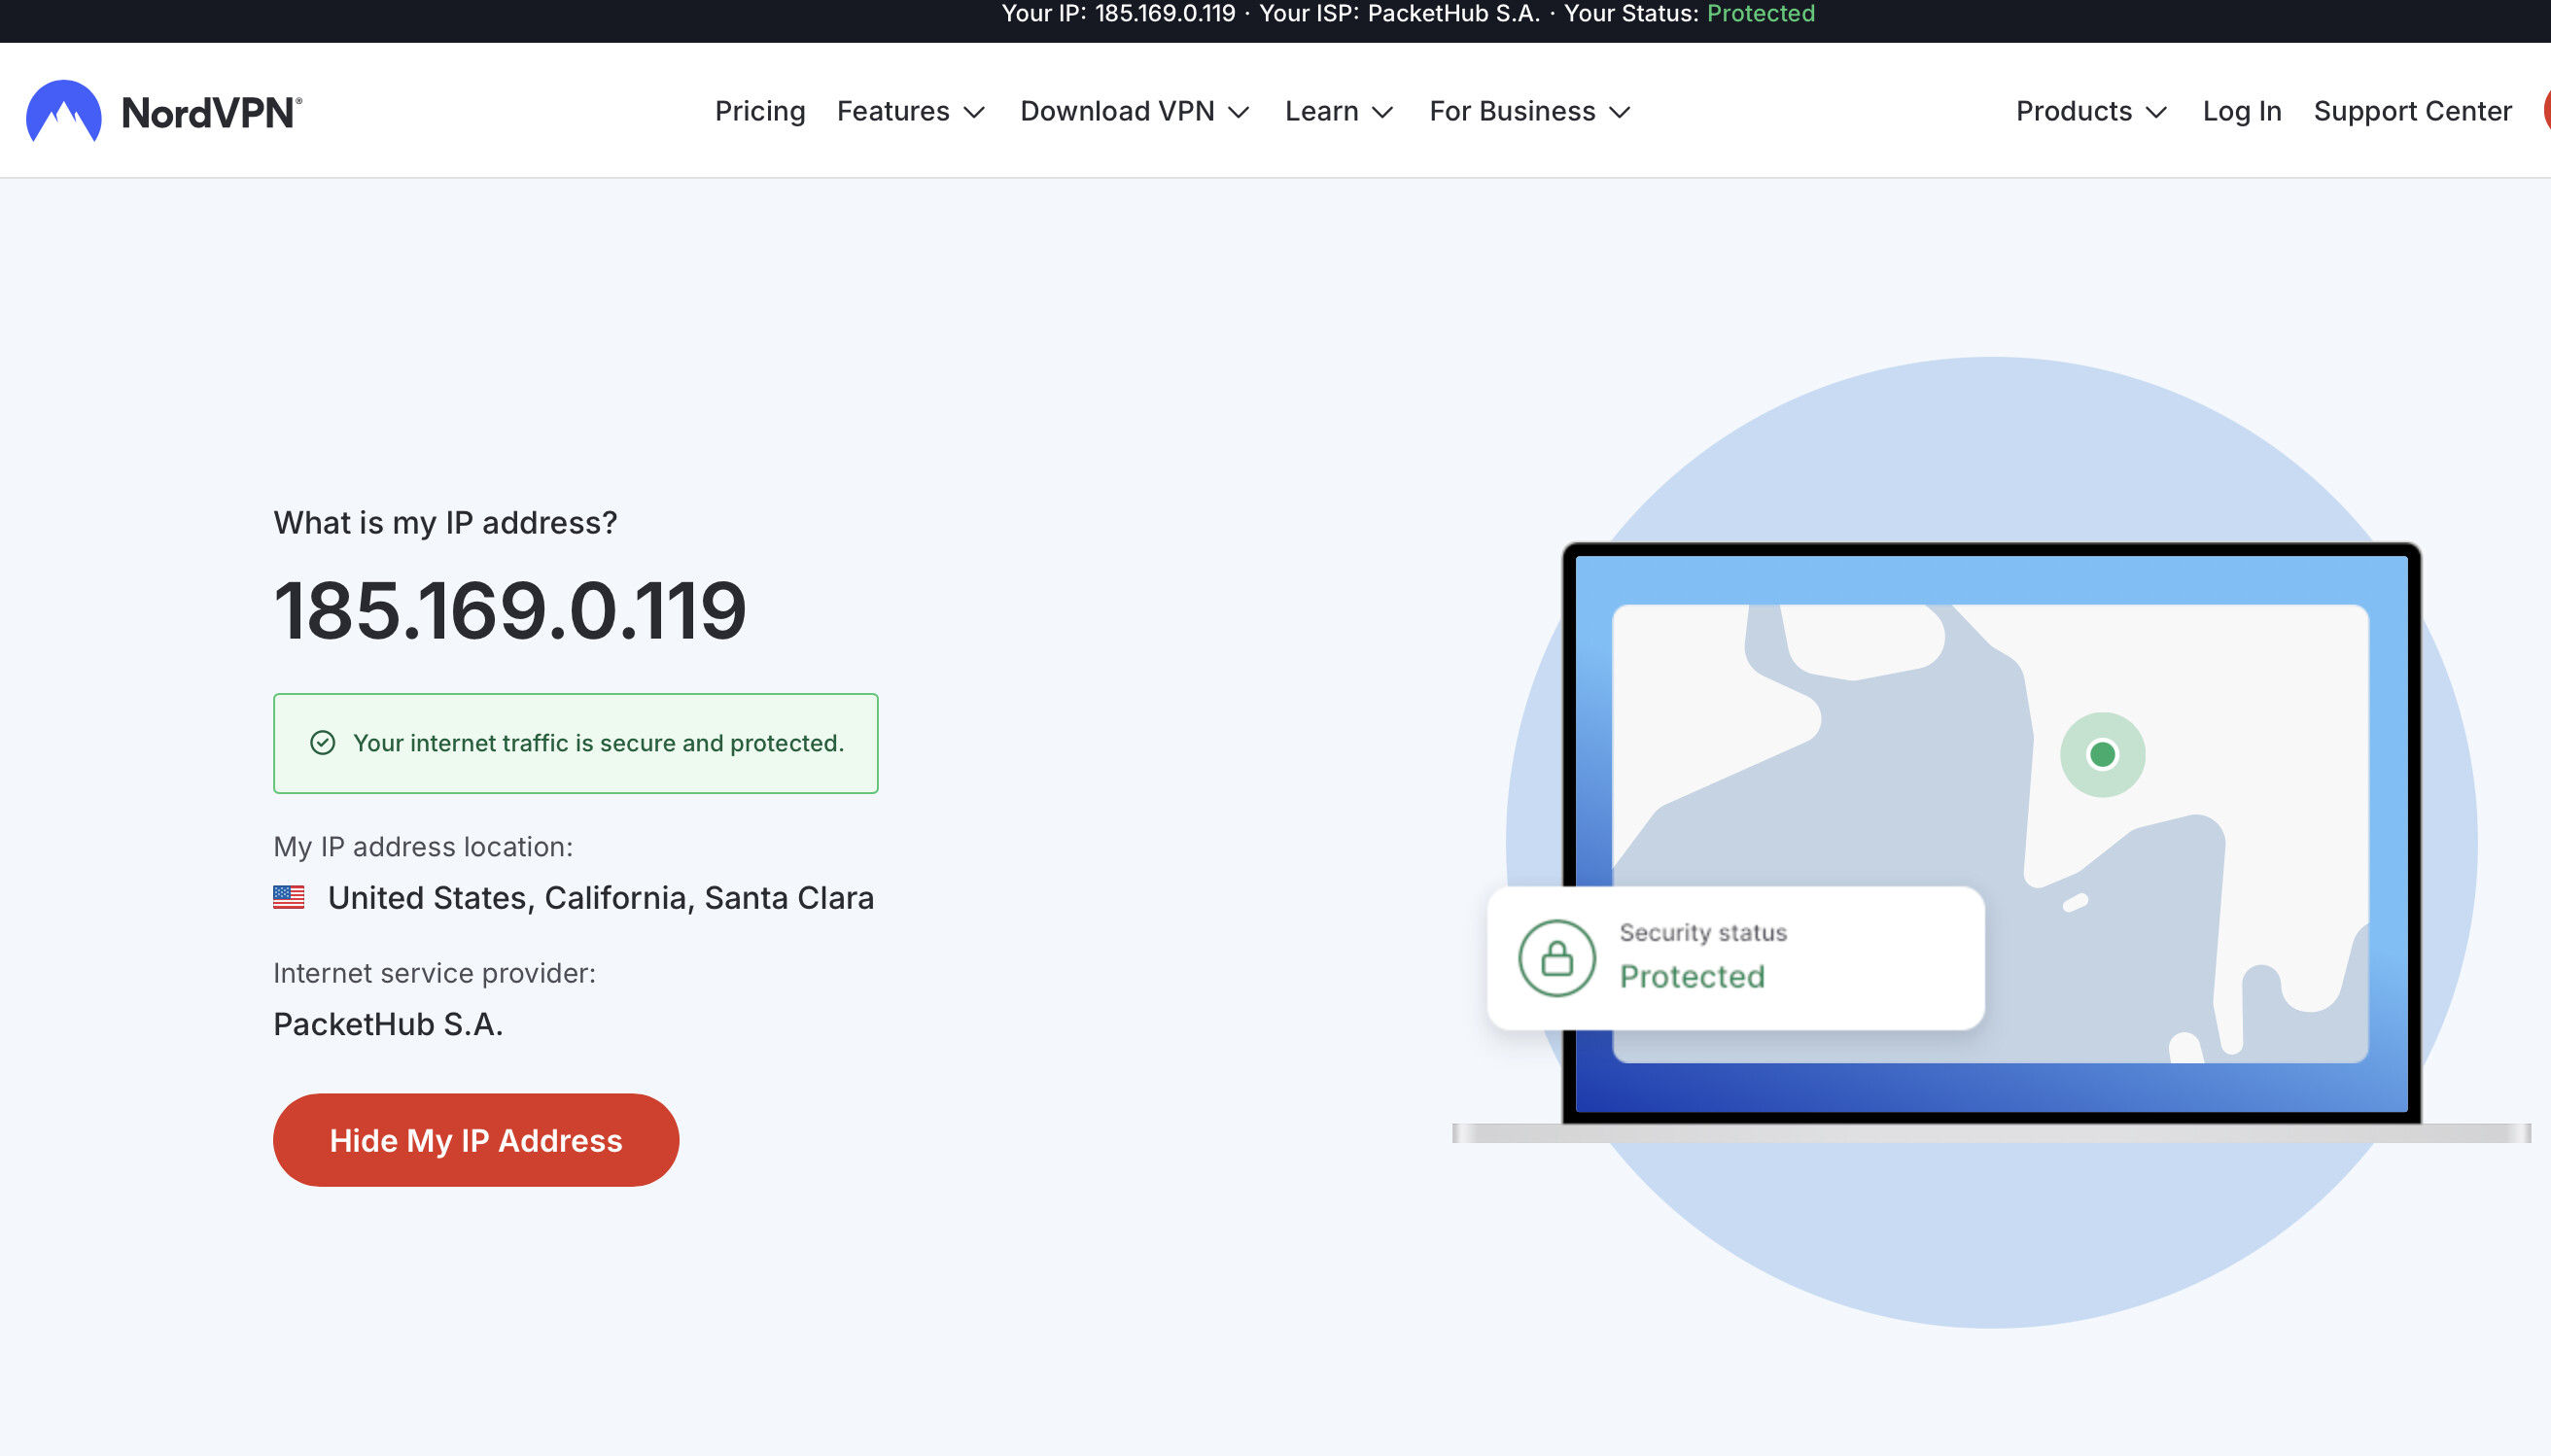
You can test the VPN, by opening a browser window in any of the devices connected to your Beryl WiFI SSID. In Google, type in 'What is my IP' and you can choose one of the many links to check it out. Of course, choose the NordVPN link too as that will show you clearly that you are connected to their servers.
That is it for setting up the VPN. Not too bad, eh?
ROUTER SETTINGS
Before we configure and enable AdGuard, let's configure our Beryl AX router.
- IPv6: Many of us prefer to just disable IPv6 on the router. IPv6 can cause issues and it is recommended to turn it off. You can always turn it back on later if you wish. On the Beryl, you go to 'Network' ---> IPv6 and ensure it is turned off (it is turned off by default)
- IPv6 on MacBooks etc: Best to turn off IPv6 on your WiFi connections. Normally, you adjust your IPv6 settings from 'Automatic' to 'Link-Local only' in your WiFi settings for your connected WiFi network. I prefer to just kill IPv6 completely on my MacBook. Open Terminal and enter
- 'sudo networksetup -setv6off Wi-Fi' to disable IPv6 completely
- 'sudo networksetup -setv6automatic Wi-Fi' to enable IPv6 (if you want to at a later time)
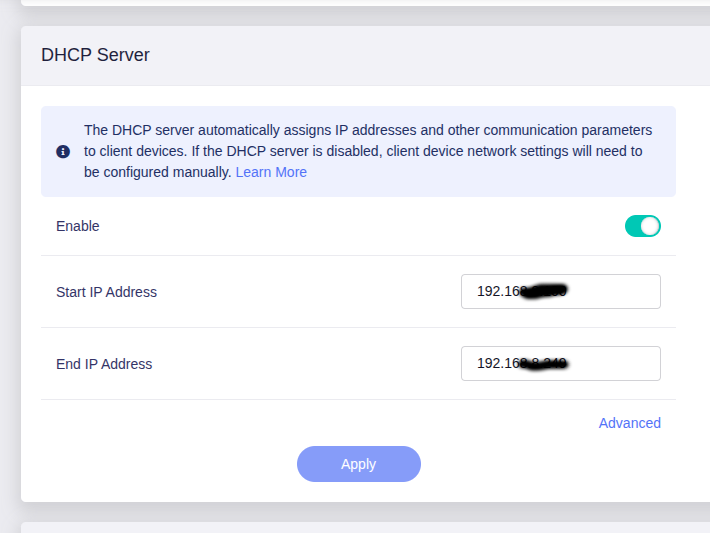
Under Network ---> LAN
- Just do a check to ensure that the 'Router IP Address' is that of your Beryl, unless you have changed the subnet)
- Ensure the 'DHCP Server' is enabled
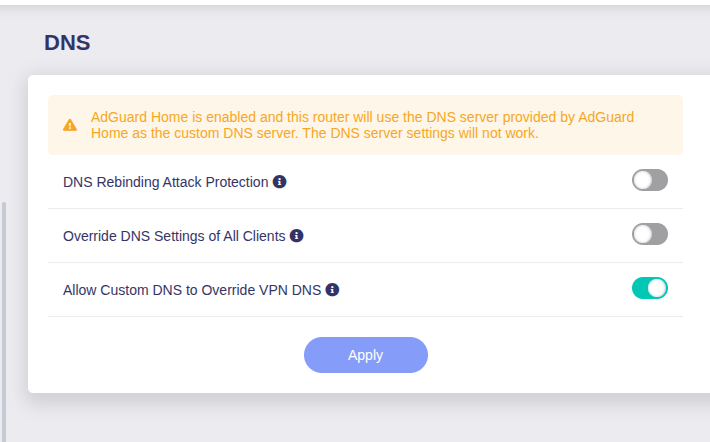
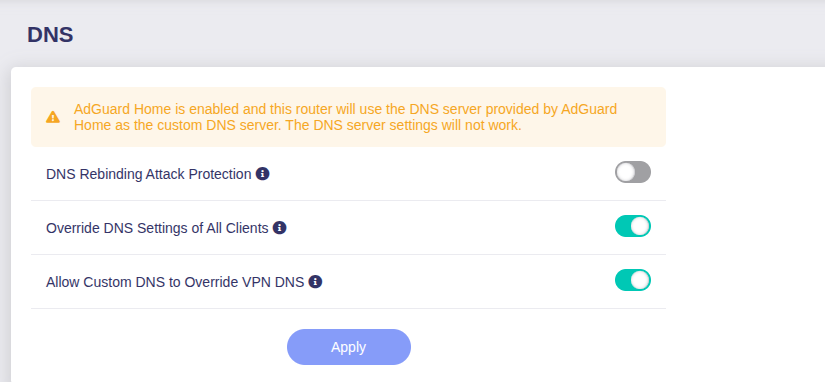
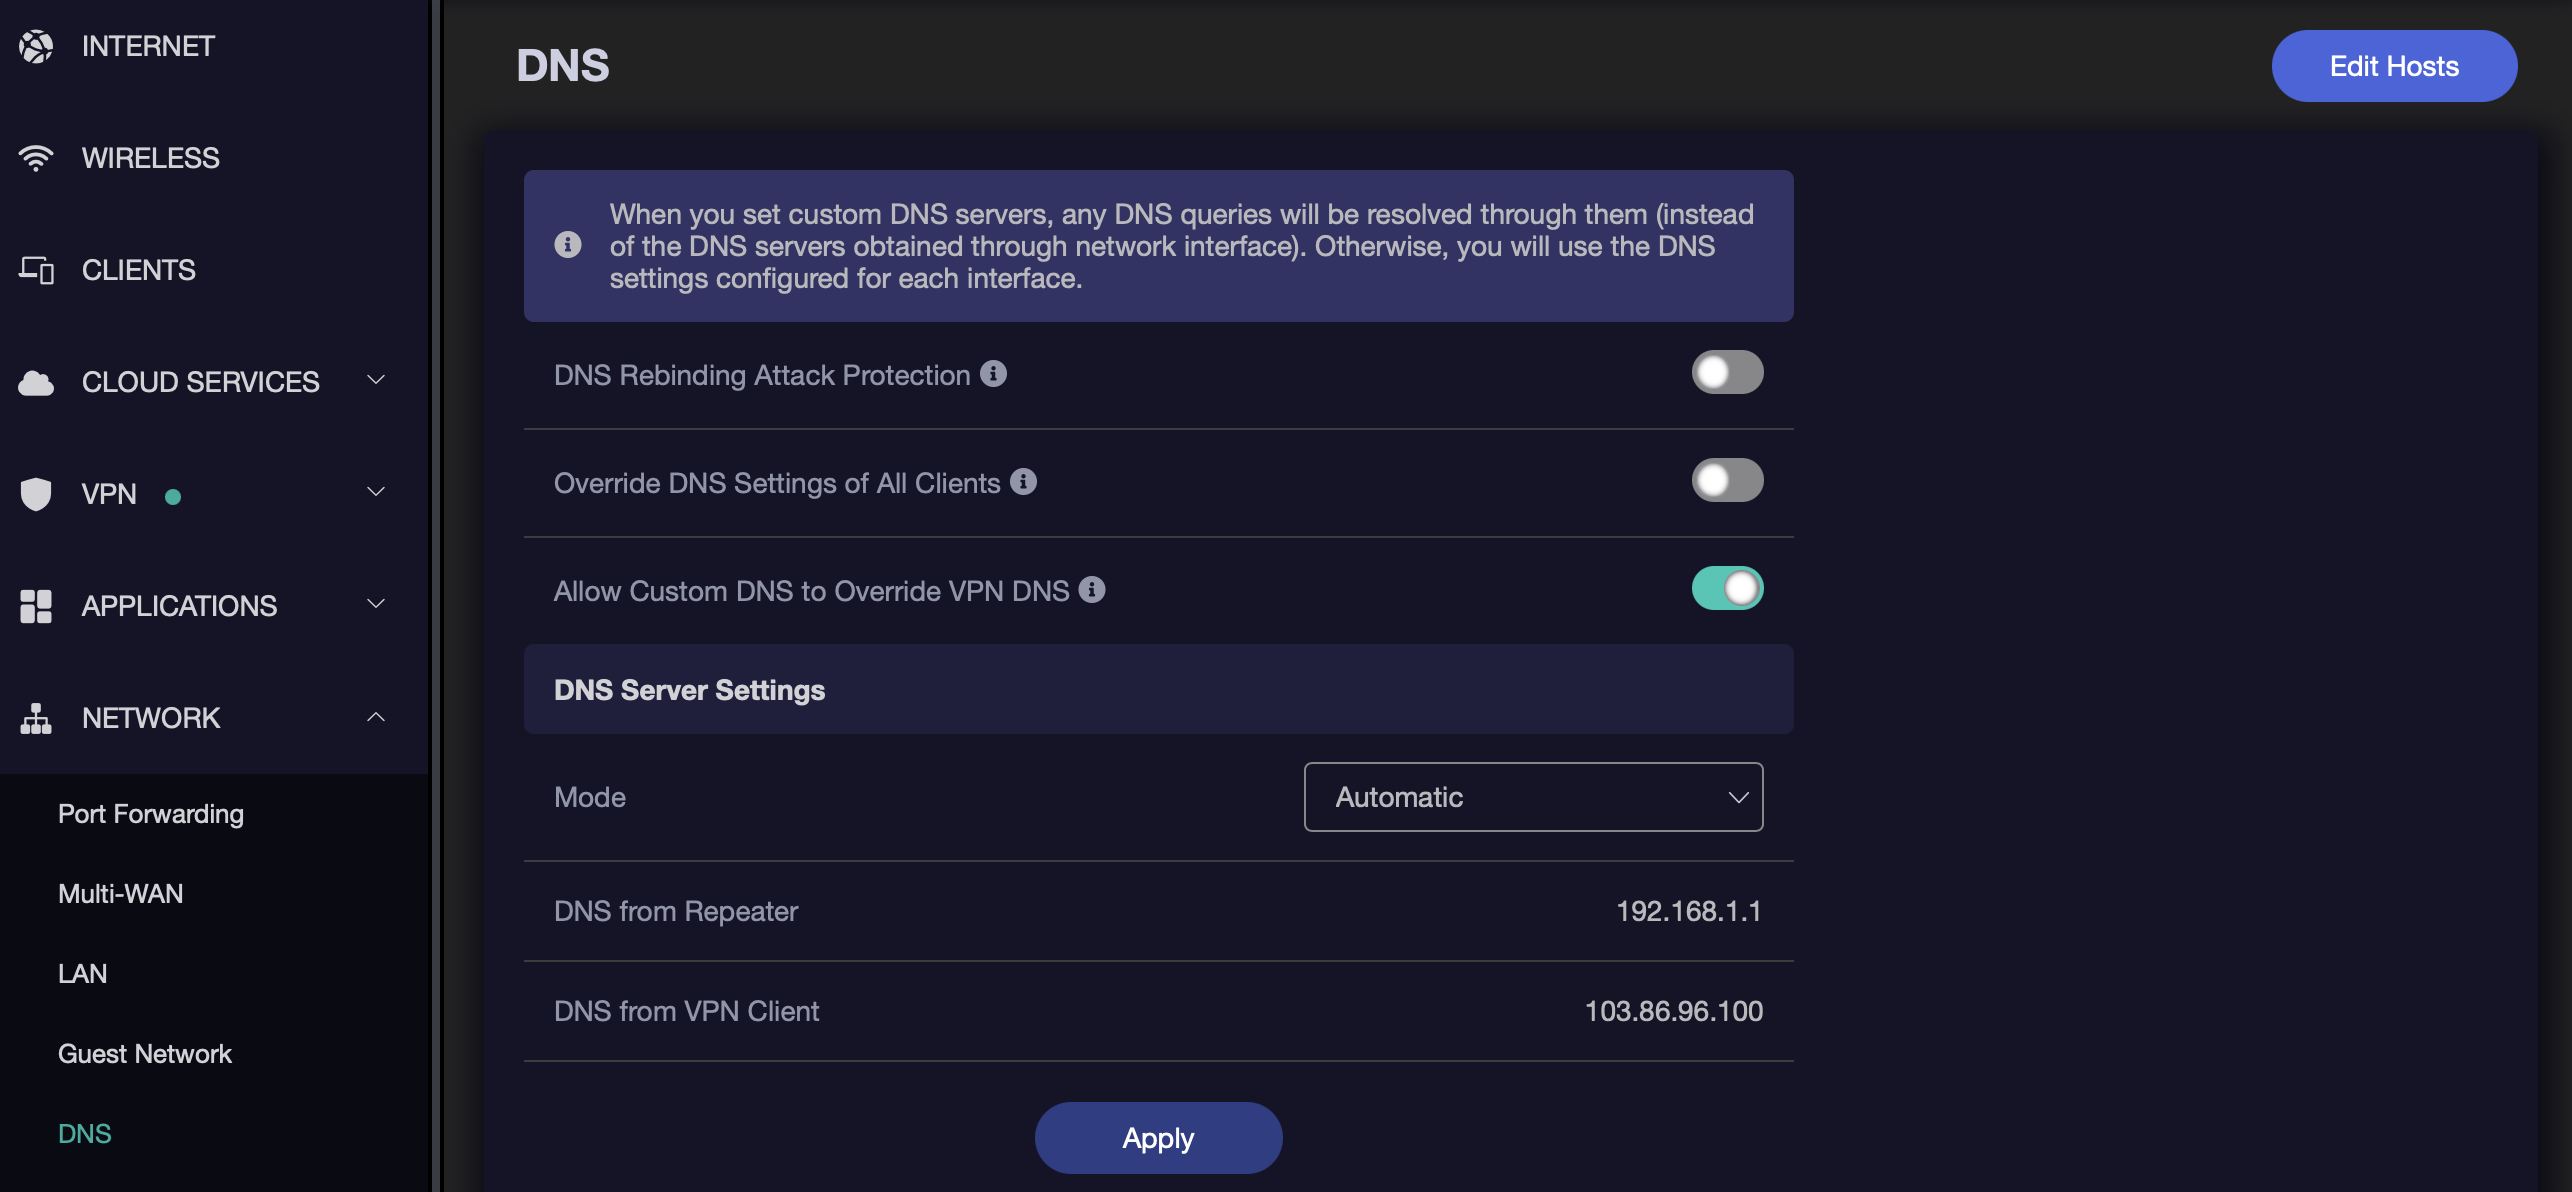
Under Network ---> DNS
- Make sure that the 'DNS Server Settings Mode' is set to 'Automatic' and that you can see 'DNS from Repeater' and 'DNS from VPN Client'
- Turn the 'Allow Custom DNS to Override VPN DNS' toggle to ON. Leave the other two switched off
Under System ---> Security
-
Change the HTTPS Port under 'Admin Panel' to be something other than 443. I just use 444. This is to avoid port conflict if you decide to enable https for the Admin Panel in AGH
-
Do note that if you change this port, then the original link to log into the router may not work. You can amend that by changing the http to https in that link. Or try and use these addresses:
- http://192.168.8.1/#/login
- https://192.168.8.1/login
- https://192.168.8.1:444/#/login (use 444 if you used that number. Else use whatever number you changed the 443 to in the Admin Panel)
You might have to refresh the page after each new link or just clear the browser cache.
That's it for router settings. Now onto the final hurdle - AdGuard Home
ADGUARD HOME SETTINGS
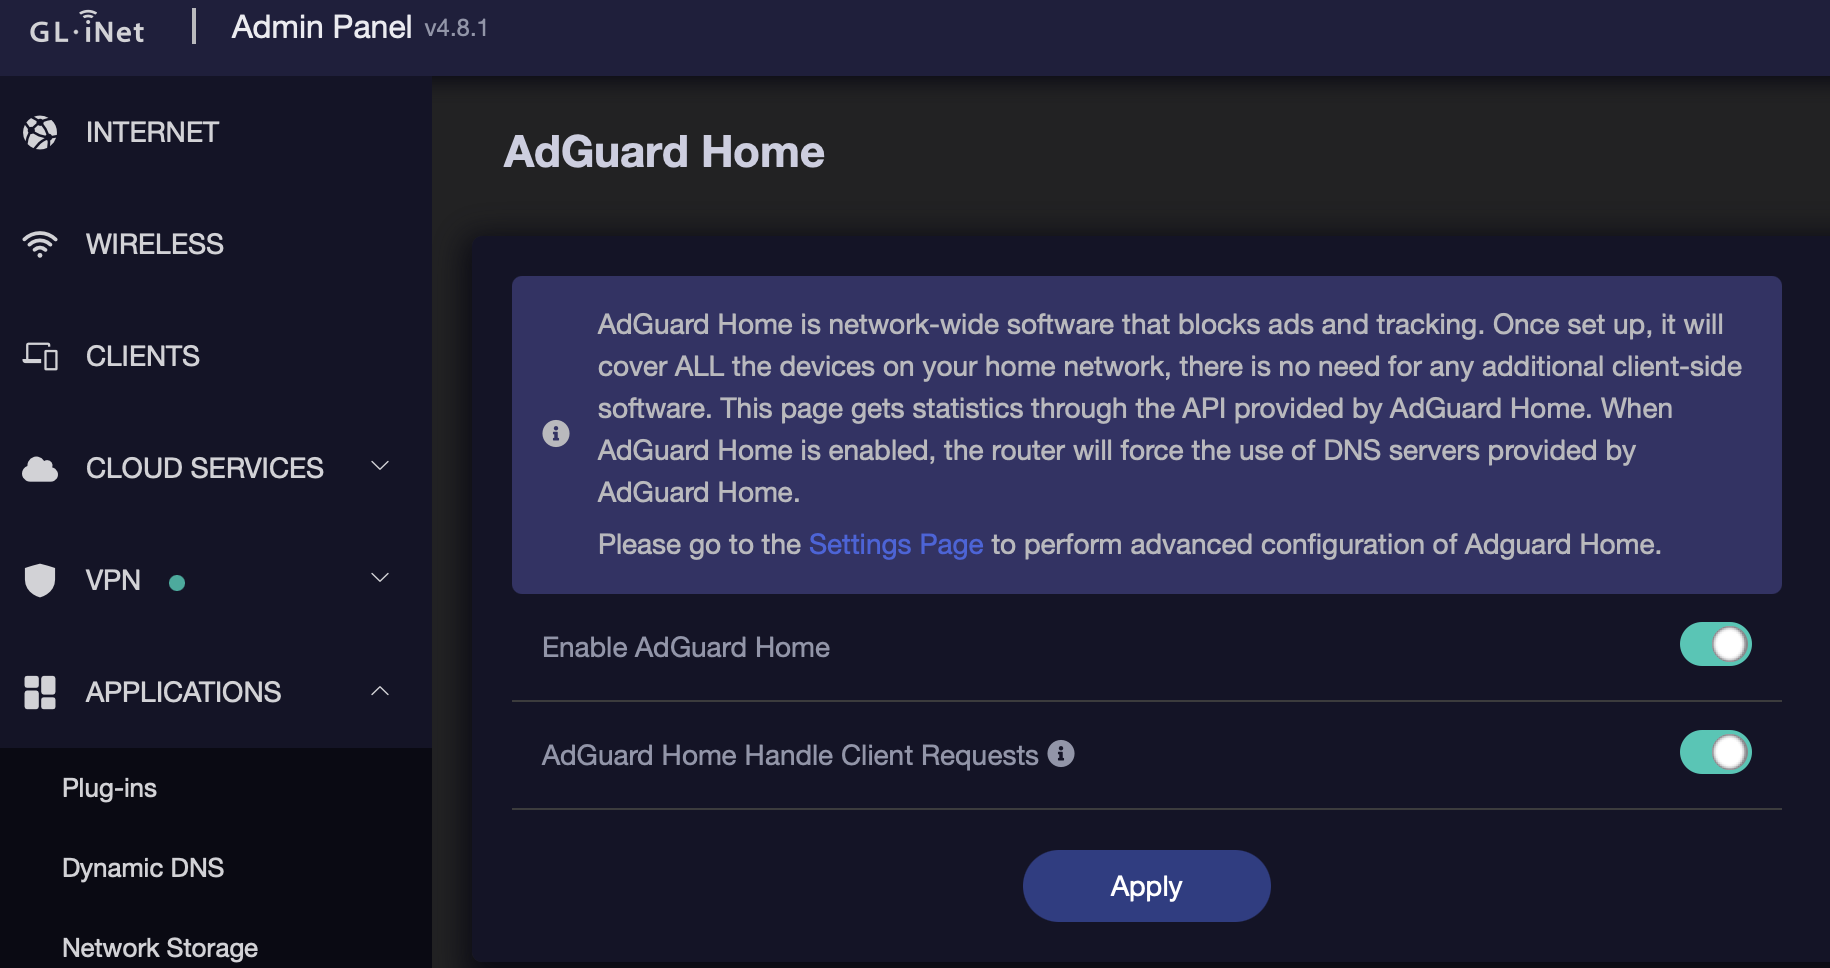
- Click on 'Applications' on the left sidebar and then on 'AdGuard Home'
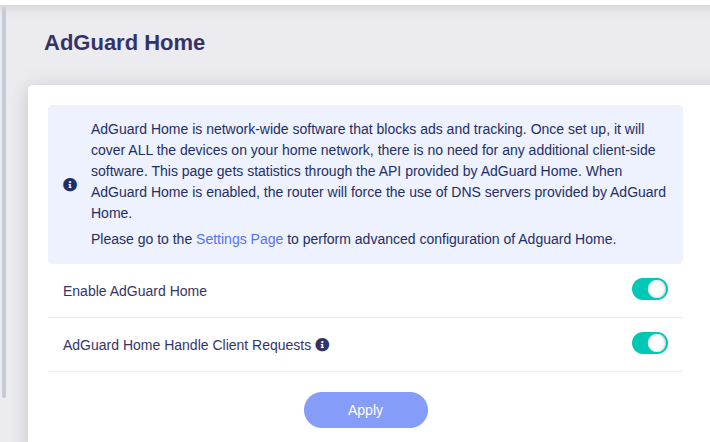
- Toggle on 'Enable AdGuard Home' and hit 'Apply'
- Once 'AdGuard Home' is enabled, then you can toggle on 'AdGuard Home Handle Client Requests' also and hit 'Apply'. Thus both the options should be switched on once you are done
One thing to note here - It is not necessary to restart ADGuard Home after changes are applied, as most changes are applied dynamically. However, there are some times, when you will need to restart the service (updates to ADGuard Home, changes to the config.yaml file etc). What I do is, that after I have configured everything on the router (WiFi, DNS, VPN, AGH) and tested to ensure it is working, I then just reboot the router, which will stop and restart your AGH service. Do note, that any time you stop AGH service, you will lose all your query logs. The query logs get wiped during each restart of AGH and thus, with any reboot of the router that has AGH installed on it
Now click on the ‘Settings Page’ hyperlink to go to the main AGH settings. You might need to edit the URI in the browser if it doesn’t open. Depending on browser settings, you might need to use https or http
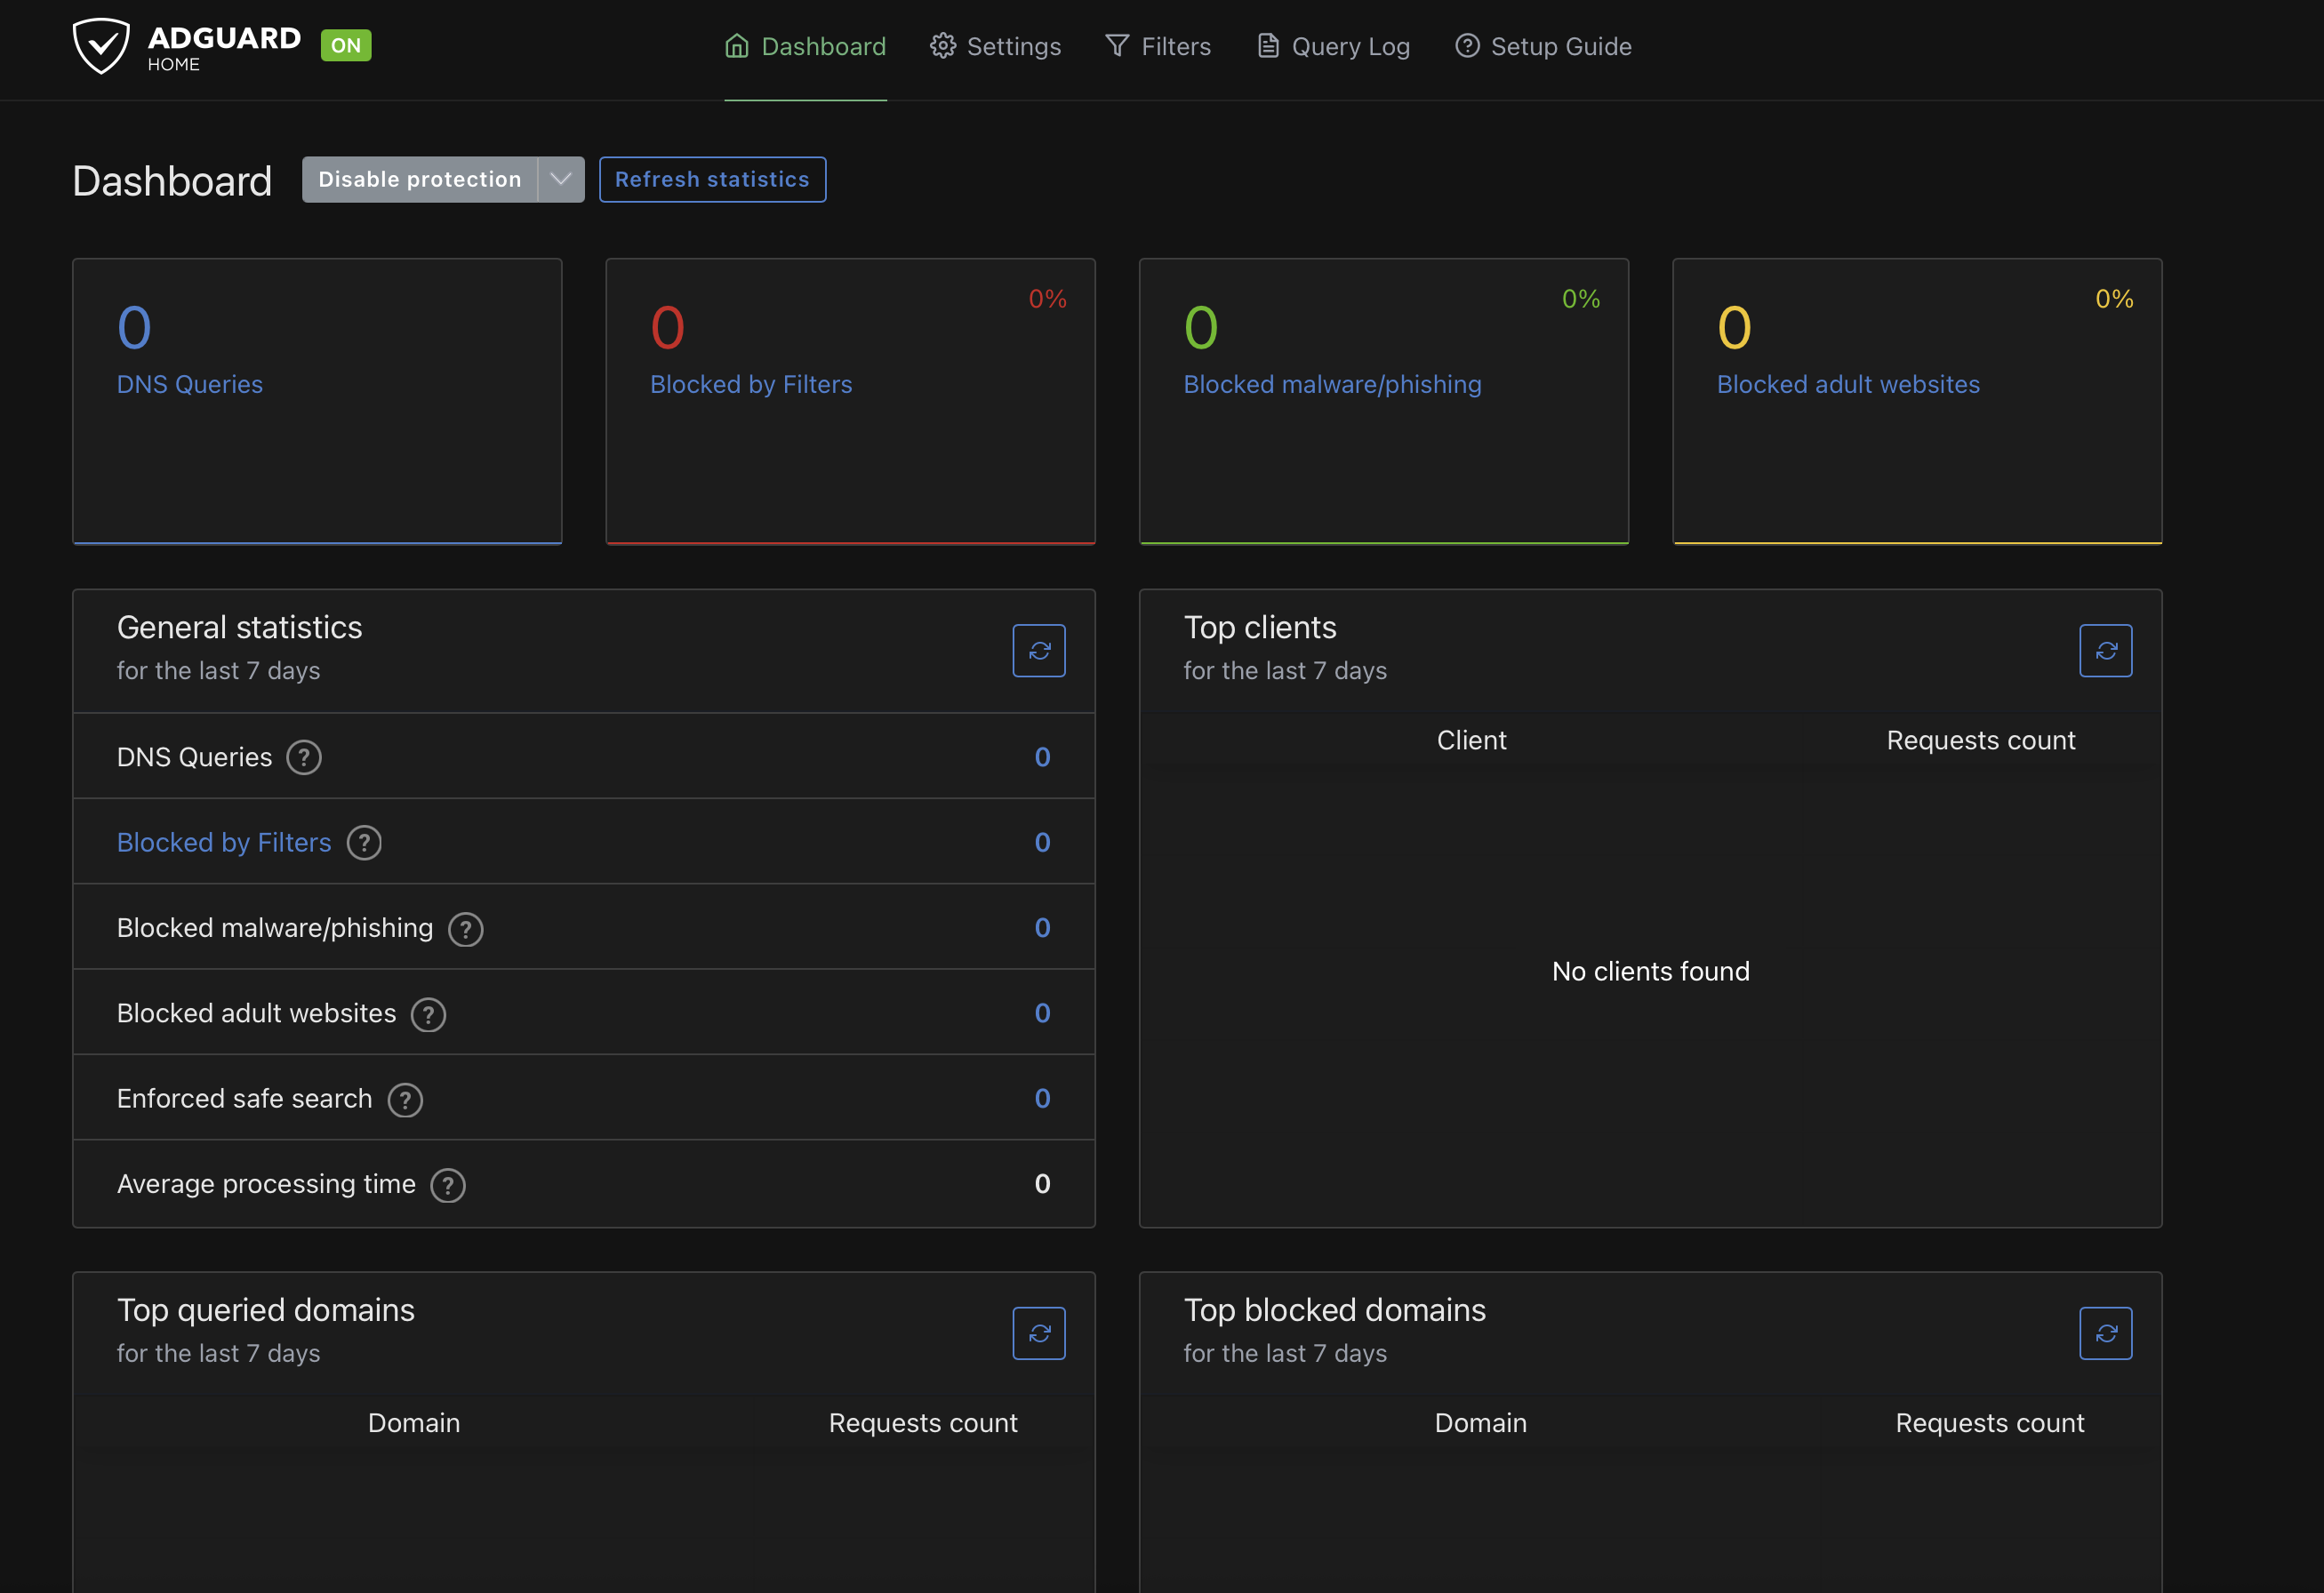
The 'Dashboard' tab is where you see all the outputs. Nothing to configure here really (can disable protection if you want or refresh the stats)
General Settings
Click on the ‘ Settings’ tab and then ‘General’ settings
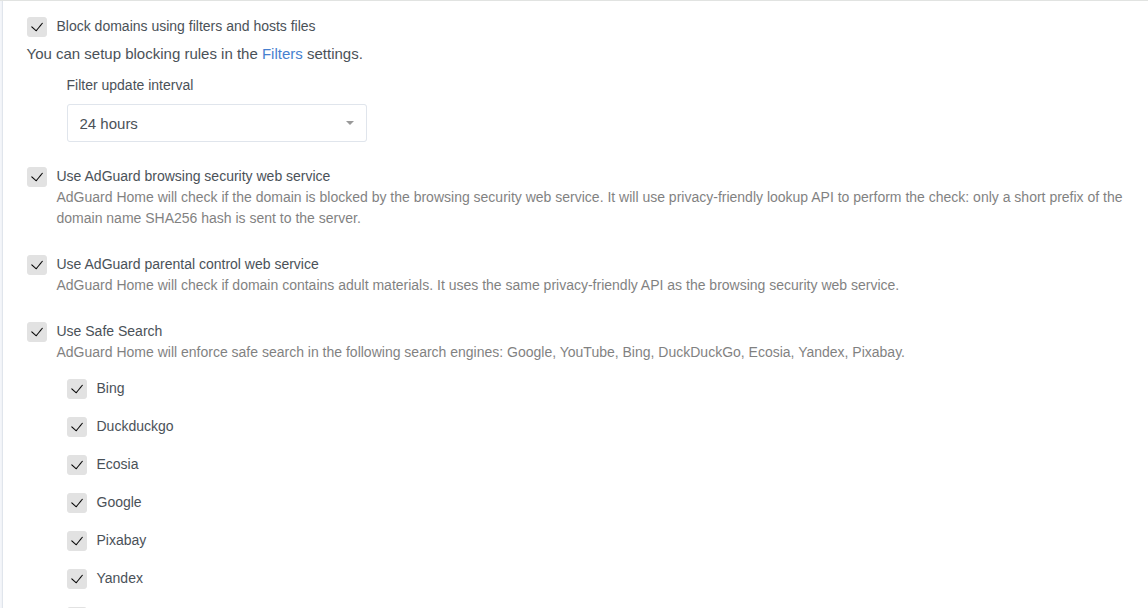
- Ensure the ‘Block domains using filters and hosts files’ is checked. I like to keep the filter updates at 12 hours, some like it more frequently. I believe the filters get updated one or two times a day, so I don’t see a need to make my poor Beryl work harder than it needs to
- Can leave the other three blank (unless you want to use these). Remember, you have some pretty awesome filters that you can use instead of enabling these generic settings
- Under Logs configuration, enable log. An important note here is that these query log files can get massive and that space, is eating into the router’s memory (which probably would be around 70% after configuring the VPN and starting AGH, and before any lists). Some users have experienced between 200MB and 300 MB per week (depending on how you have configured AdGuard. If AGH is handling client requests, you will have a ton of queries). I just keep mine at 7 days for now (both the Query logs and Statistics log). The Statistics log doesn’t take nearly this much space, but rather a fraction of(as it is only a few charts instead of written text). You can thus increase the statistic log if you wish - but do so only if you really will be referring to it. I might ultimately just make Query 24 hours and stats 7 days
- As before, enable statistics and choose the duration
- Don’t forget to hit Save for each option
DNS Settings
Click on ‘Settings’ and ‘DNS’ settings.
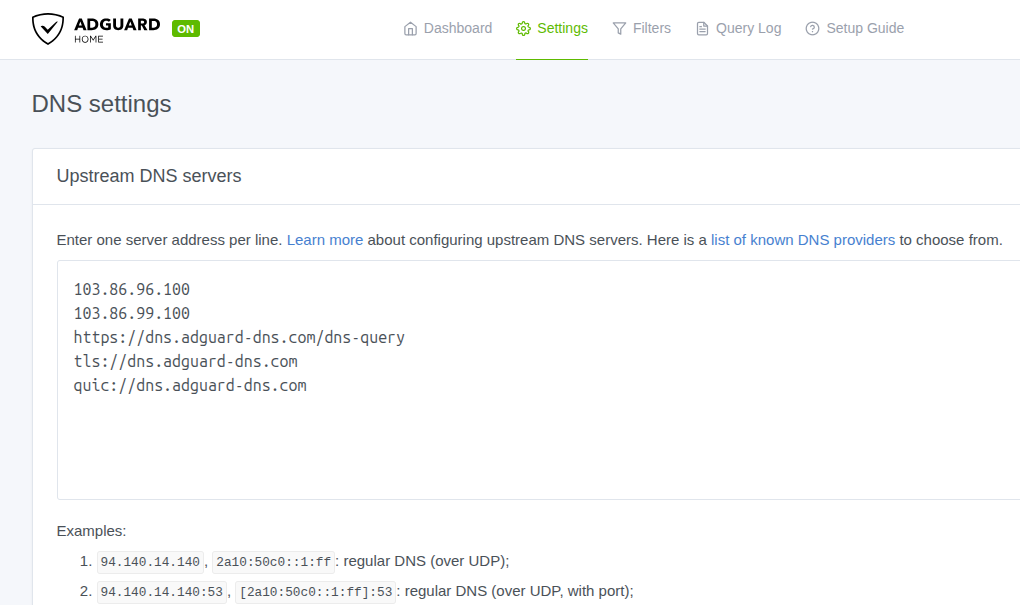
Upstream Servers
- The upstream DNS servers are the ones that will be contacted by the Beryl to help resolve domains that it can’t resolve locally. Think of the Beryl as a teaching assistant, teaching a class. You, the student (let’s say the phone or computer on the Beryl’s network), asks the TA (Beryl) a question. The TA gives you a blank look, and decides to reach out to the Professor (Upstream Server), for the answer. The professor (Upstream DNS server) then gives the answer (domain name resolution) to the TA (Beryl router).
- Since we want to use encrypted DNS, we will need to input one or more encrypted DNS server addresses in here. You can choose to use DNS over HTTPS, DNS over TLS or DNS over QUIC. DNS over HTTPS (DoH) is the most mature among them all.
- If you have subscribed to AdGuard’s Personal DNS, then you will just need to enter those addresses in here. AdGuard generates DoH, DoT and QUIC addresses for each configured device on the server. There is a 4th option (which I really like and use), which is the link generator, that generates an upstream server link, for your specific device and server. If you use that option, you can just drop those links into this box.
- For everyone that is not using the Personal DNS plan, you can use any Encrypted DNS servers in here. I would advise to put in at least 2 or 3. By using multiple Encrypted servers, AdGuard can choose the fastest and reliable one, to resolve the domain.
- Make sure you DON’T use a plain IPv4 or IPv6 address here, else the queries will be unencrypted.
- Among the really good ones are, Cloudflare, Quad9, Mullvad, ControlD, AdGuard etc.
- Each of the above offers multiple encrypted addresses to suit different requirements. You can choose just filtering out ads, or ads and malware, or ads, malware and adult content etc.
- But there is a caveat - choosing servers that filter out ads and malware, doesn’t give you insight into what is being filtered. You are solely relying on on that server to filter out ALL the ads or ALL the malware by using them. It could happen, that what you consider a nuisance, Google Upstream does not.
- Thus my advice, is to get an encrypted DNS server, with DNNSEC, no filters and no logs. Why? Because you just want the dang upstream server, to do its job by encrypting your queries. You will provide that server with the necessary filters to filter out ads, malware, adult content etc. By doing so, you can ensure you give that upstream server, the highest quality filter blocklist that’s needed to address your requirement - rather than relying on that same upstream server’s, one size fits all generic list, that has no transparency
For those of you that just want a list of servers, you can copy and paste a select few or all of the servers below. They block out ads and malware (not adult content or gambling):
Cloudflare
https://security.cloudflare-dns.com/dns-query
security.cloudflare-dns.com
Quad9
https://dns.quad9.net/dns-query
tls://dns.quad9.net
AdGuard
https://dns.adguard-dns.com/dns-query
tls://dns.adguard-dns.com
quic://dns.adguard-dns.com
Mullvad
https://base.dns.mullvad.net/dns-query
base.dns.mullvad.net
dns.google
https://dns.google/dns-query
Control D
https://freedns.controld.com/x-hagezi-pro
x-hagezi-pro.freedns.controld.com
quic://x-hagezi-pro.freedns.controld.com
Next choose ‘Parallel requests’ for fast queries
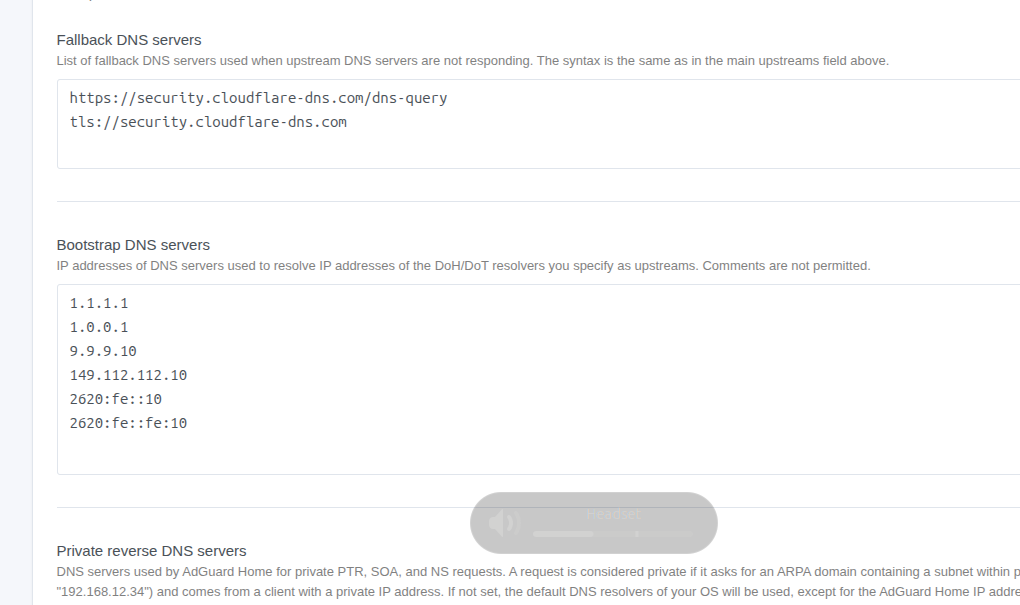
Fallback DNS servers are those, that will be used in place of the Upstream ones, should the upstream ones fail). If you have used 3 or more already in the Upstream box, you really don’t need to enter anything here. It is unlikely that all 3 or more DNS servers from different companies will fail together. Of course since you might have a few more addresses you like and want to use, you can drop those into the fallback. Personally, I would rather you drop those servers into the Upstream servers box, as those addresses might get used sometimes, since AGH will be checking out all the servers in that box (using one of the methods like Parallel). In the fallback box, they will only get approached and used, should everything in the upstream fail.
Bootstrap DNS Servers: Now before AGH can send the query to the upstream server to be resolved, it needs to be able to connect to the upstream server somehow. If you have chosen say, Cloudflare address, AGH needs to find a way to connect with that address. That is where bootstrap servers come in. AGH will use the bootstrap server(s) to perform an unencrypted DNS lookup of the encrypted Upstream server’s hostname. Once the IP address is known, then AGH can send the encrypted packets to the upstream server.
Notice that the bootstrap is just a plain DNS server. Hence choose a reliable and fast server. These are what I would drop into the bootstrap box (1.1.1.1, 1.0.0.1, 9.9.9.10, 149.112.112.10). Essentially Cloudflare and Quad9. Cloudflare is considered among the fastest, if not THE fastest DNS server. I have also only dropped in IPv4 addresses (you can also drop in the IPv6 addresses if you want to).
Private Reverse Servers
- For Private reverse DNS servers, just use your router’s (Beryl AX) IP address (192.168.8.1). If you are using another subnet with a different address, just use that address. Don’t leave it blank. In my limited experience, leaving it blank leads to higher latency. If you leave it blank, it will use 127.0.0.1 as the address
- Check both the boxes (Use private reverse DNS resolvers, Enable reverse resolving of clients’ IP addresses)
- Hit ‘Apply’
In the DNS Server configuration
- Leave the default numbers as is
- Check Enable EDNS, Enable DNSSEC, Disable resolving of IPv6 addresses. You can leave the EDNS unchecked if you like. EDNS gives you more geographical accuracy and less latency at the expense of a little privacy. Pick your poison.
- For Blocking mode, choose Null IP
- Blocked response TTL (3600)
- Turn on ‘Optimistic caching'
- Hit ‘Save’
Encryption Settings
- Now go to Settings —> Encryption Settings
- We are only a client (not server) and hence we really don’t care about encryption for queries that stay local.
- If you would like the admin login interface for the Beryl to use https, then first, check the ‘Enable Encryption’ on top, then check the ‘Redirect to HTTPS automatically and then uncheck the ‘Enable Encryption’ box. Hit save at the bottom. This is not really required as all the traffic we are talking about, is local. Thus we don't have to worry about encryption.
Filters
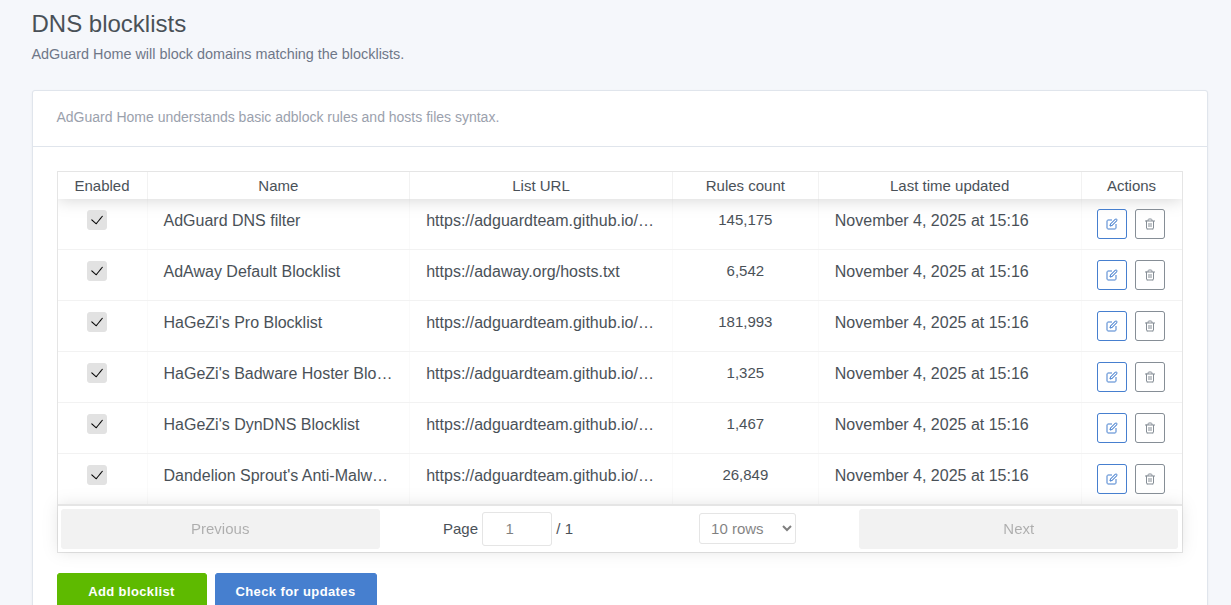
Now go to Filters —> DNS blocklists
Listen to me here - don’t get the urge to use every list possible in there. For one there is too much redundancy. Secondly, the Beryl AX is a small little baby. It doesn’t have that much space. You enable 10 of these lists, with tens of thousands of lines each, and your router will go to sleep...forever.... with Fido, who you told the kids, went to the "Farm." It is a pain to then try and rectify a freeze due to overload.
IMO the best lists are by HaGeZi. You can see all his lists here (scroll down to see them all).
I would choose the following if you are just starting out:
- HaGeZi’s Pro Blocklist: Click on 'Add blocklist' ---> 'Choose from the list' and then choose the Pro blocklist.
- Along with the Pro, choose the following three (HaGeZi has recommended to add these for AdGuard Home):
- HaGeZi's Badware Hoster Blocklist
- HaGeZi's DynDNS Blocklist
- Dandelion Sprout's Anti-Malware List
This is ALL you need when you are starting out. If you later feel confident that the router is doing okay and is not struggling, then you can add the following:
- HaGeZi’s Threat Intelligence Feeds - The one in the list is the full version with over 630K entries. Instead, go again to 'Add blocklist' ---> 'Add a custom list'. Go to the HaGeZi DNS list page on GitHub, copy the Threat Intelligence Feeds Medium list for AdGuard, and paste it into the 'Enter a URL......' box and hit 'Save' (the 'Enter Name' field will auto-populate once you hit 'Save')
For now DON’T even think of any other list for the router. It will crash. HaGeZi’s lists are truly excellent with almost 0 redundancy. They also include rules sourced from the other lists you see in the database.
If you are in the Apple Ecosystem, you would need to turn off Private Relay if you have that on. However, that alone will not prevent Apple from using their DNS when they can (e.g. when using cellular data). It is thus important to create rules to prevent Apple from using its DNS servers. Previously, your rule could just send a default or null response. However, per Apple, the only way to prevent their DNS servers being used, is to do a DNS rewrite. So go to Filters --> Custom Filtering and then copy and paste the following into the box there:
 #Block iCloud Private Relay - need to send 'NXDOMAIN' response to block properly
 ||mask.icloud.com^$dnsrewrite=NXDOMAIN;;
 ||mask-h2.icloud.com^$dnsrewrite=NXDOMAIN;;
 ||mask-api.icloud.com^$dnsrewrite=NXDOMAIN;;
 ||mask-t.apple-dns.net^$dnsrewrite=NXDOMAIN;;
 ||mask.apple-dns.net^$dnsrewrite=NXDOMAIN;;
 ||mask-api.fe.apple-dns.net^$dnsrewrite=NXDOMAIN;;
Once done, hit 'Apply' and you should be good to go.
That’s it! Give one last look, then go to the main router page and reboot the router once you are satisfied everything is okay.
- Once the router reboots:
- Check your IP address by Googling 'What is my IP'?
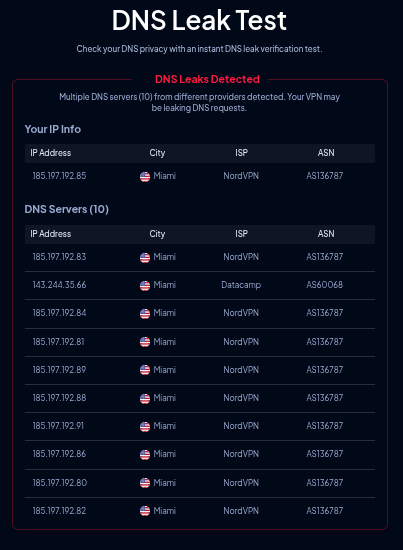
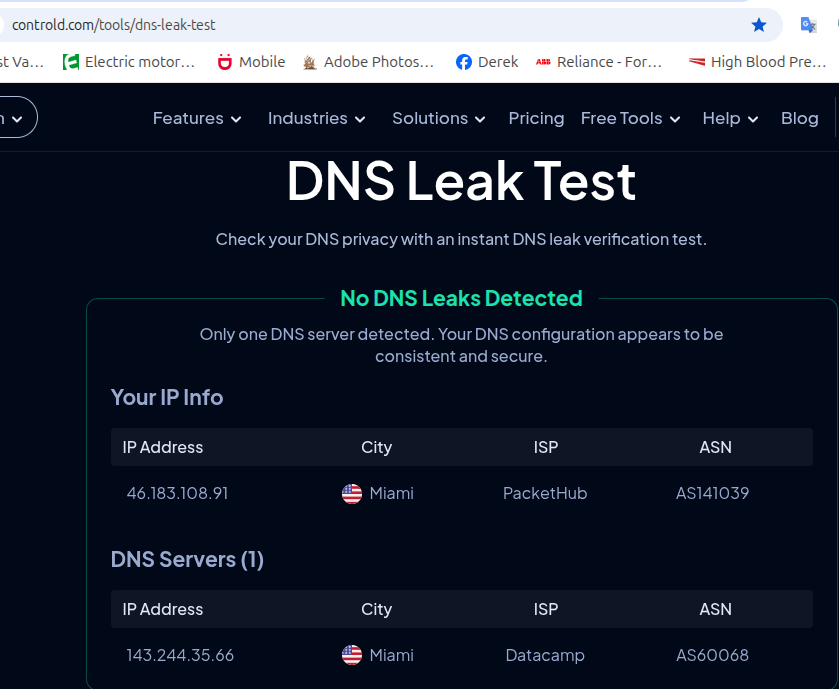
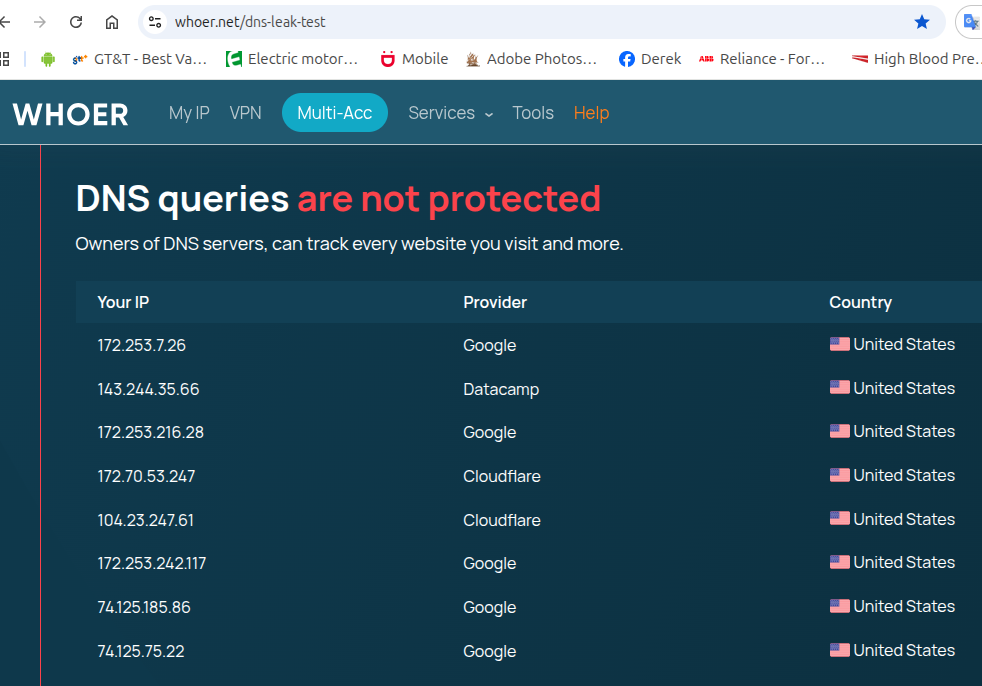
- Check for DNS Leaks. Google 'DNS Leak Test' for links. I like to use the one by ControlD
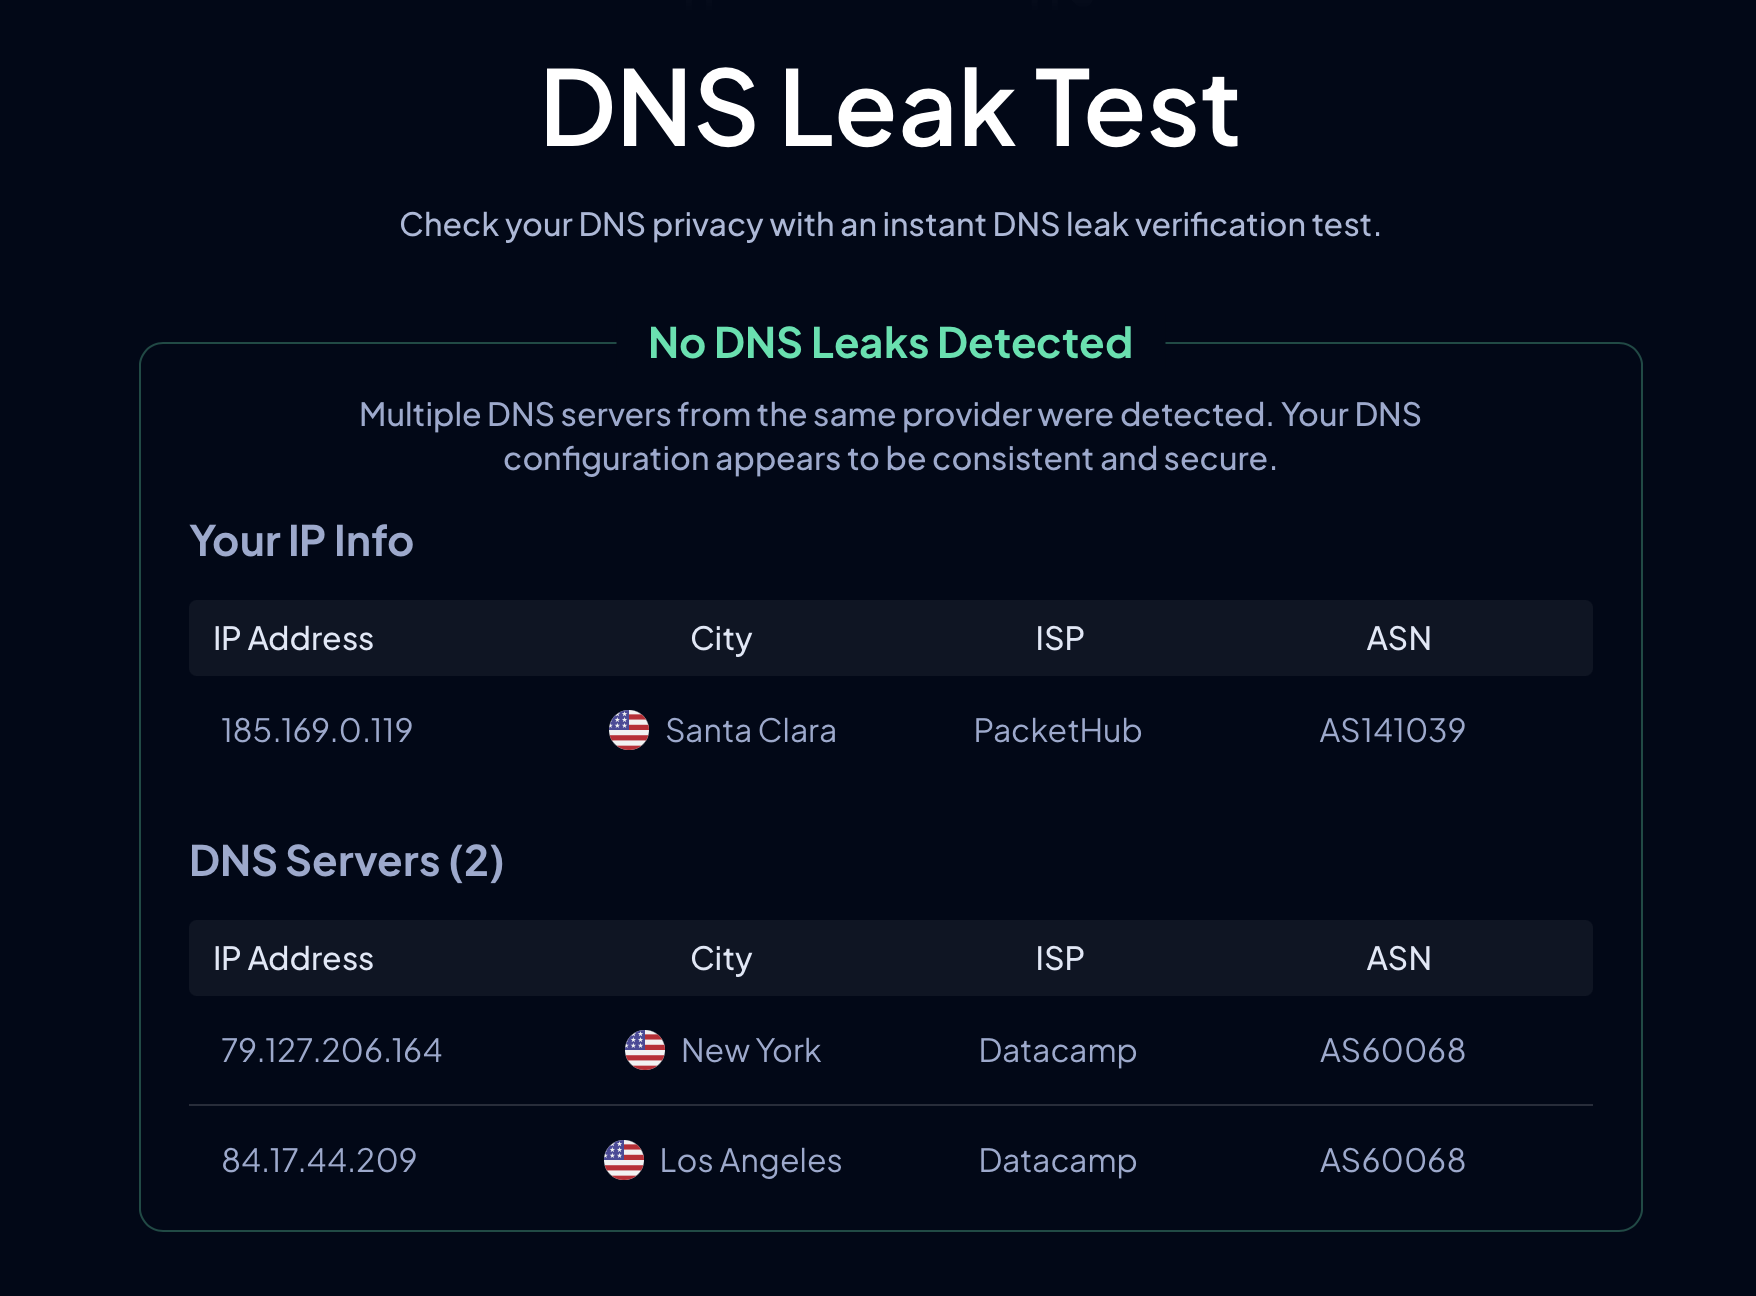
If you see any DNS leakage, make sure that the router's installed firmware, is NOT v4.8. As mentioned before, that firmware has DNS leak issues. The 4.8.1 stable version should be out soon, which will fix this. In the interim, if you are on v4.8, you can either roll back to v4.7.4 stable version, or download a snapshot version of v4.8.1 from the download center. For the snapshot version, you will need to go to the download center and then select the 'Snapshot' tab. Do remember that the snapshots are not considered stable versions, and are not normally recommended for downloading. However, given the current issues with the stable version of v4.8, I would recommend getting it, as it fixes the DNS leaks, and those of us, who have downloaded it, have had no issues. If you are not comfortable with the snapshot version, and have v4.8 currently on your router, you should definitely roll back to 4.7.4.
Once they release the stable version of 4.8.1, I strongly recommend using the U-Boot installation to upgrade, as that will wipe everything out (including any corrupt files that have not been overwritten by this back and forth, upgrading/ downgrading process) - leading to a totally clean install on your router system. Of course this is just my opinion and what I will be doing.
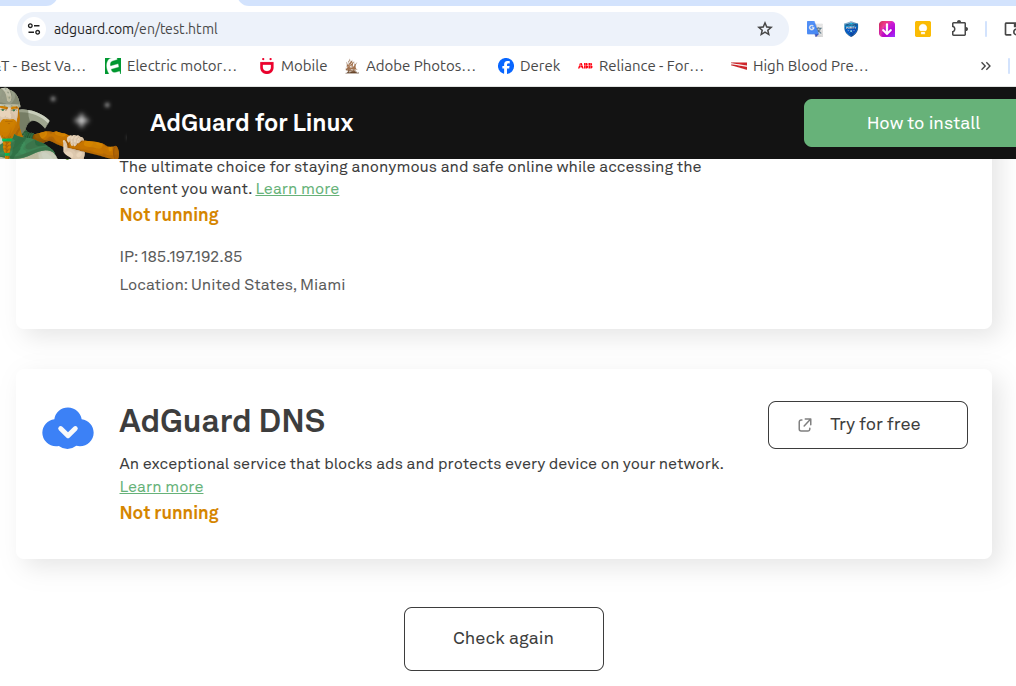
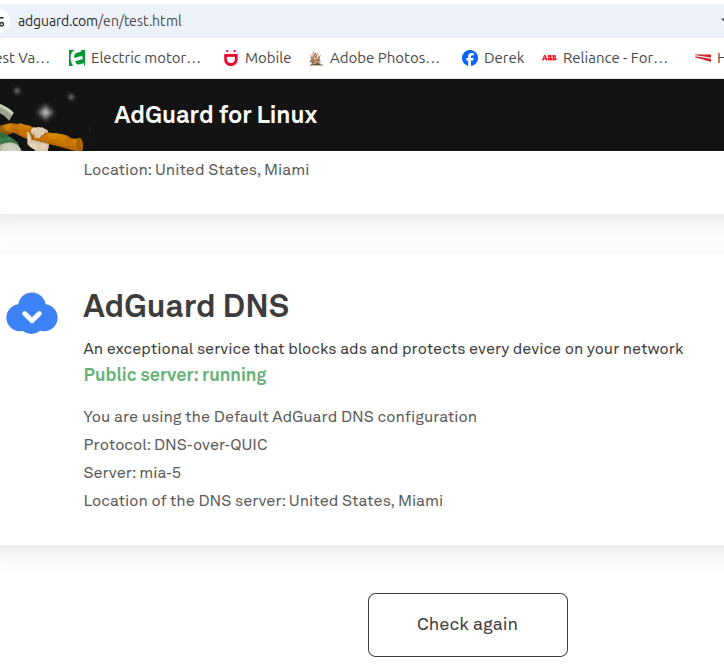
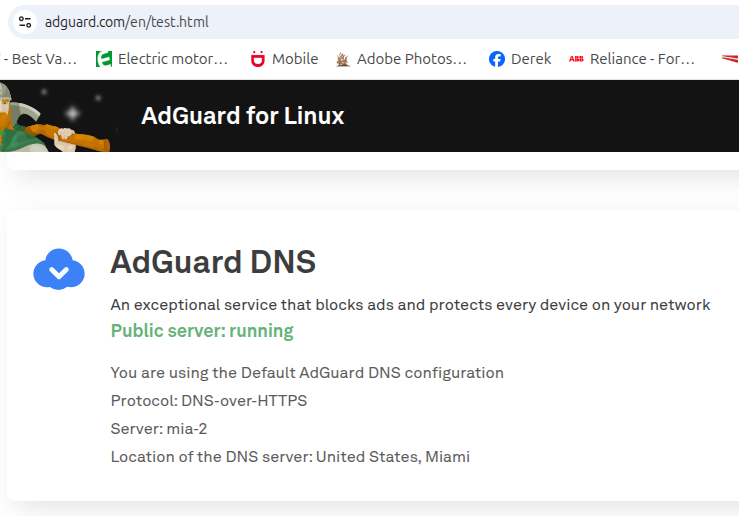
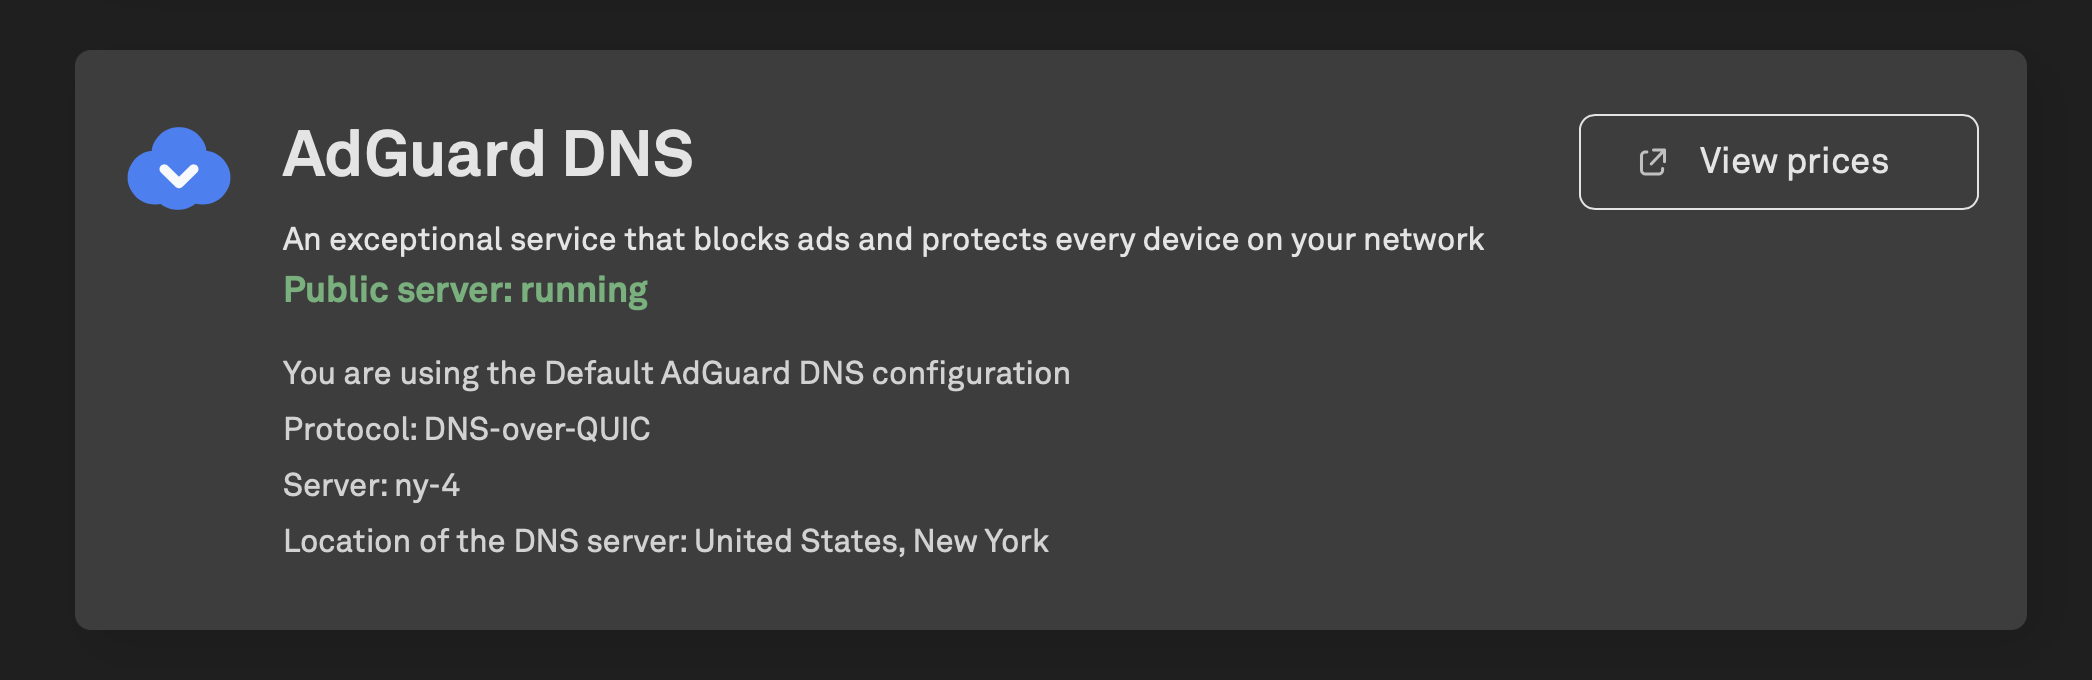
Make sure AdGuard is running properly by using the AdGuard Diagnostic Test page. Scroll down to the 'AdGuard DNS' section. You should see that the Public Server is in green font and running. You will need to make sure you turn off or pause any AdGuard software or app on the device you are using to test the Beryl AX. So if you are using your Phone to open this diagnostic link, make sure you turn off AdGuard on the phone before opening the link. Else the results shown will be for your phone and not the Beryl.
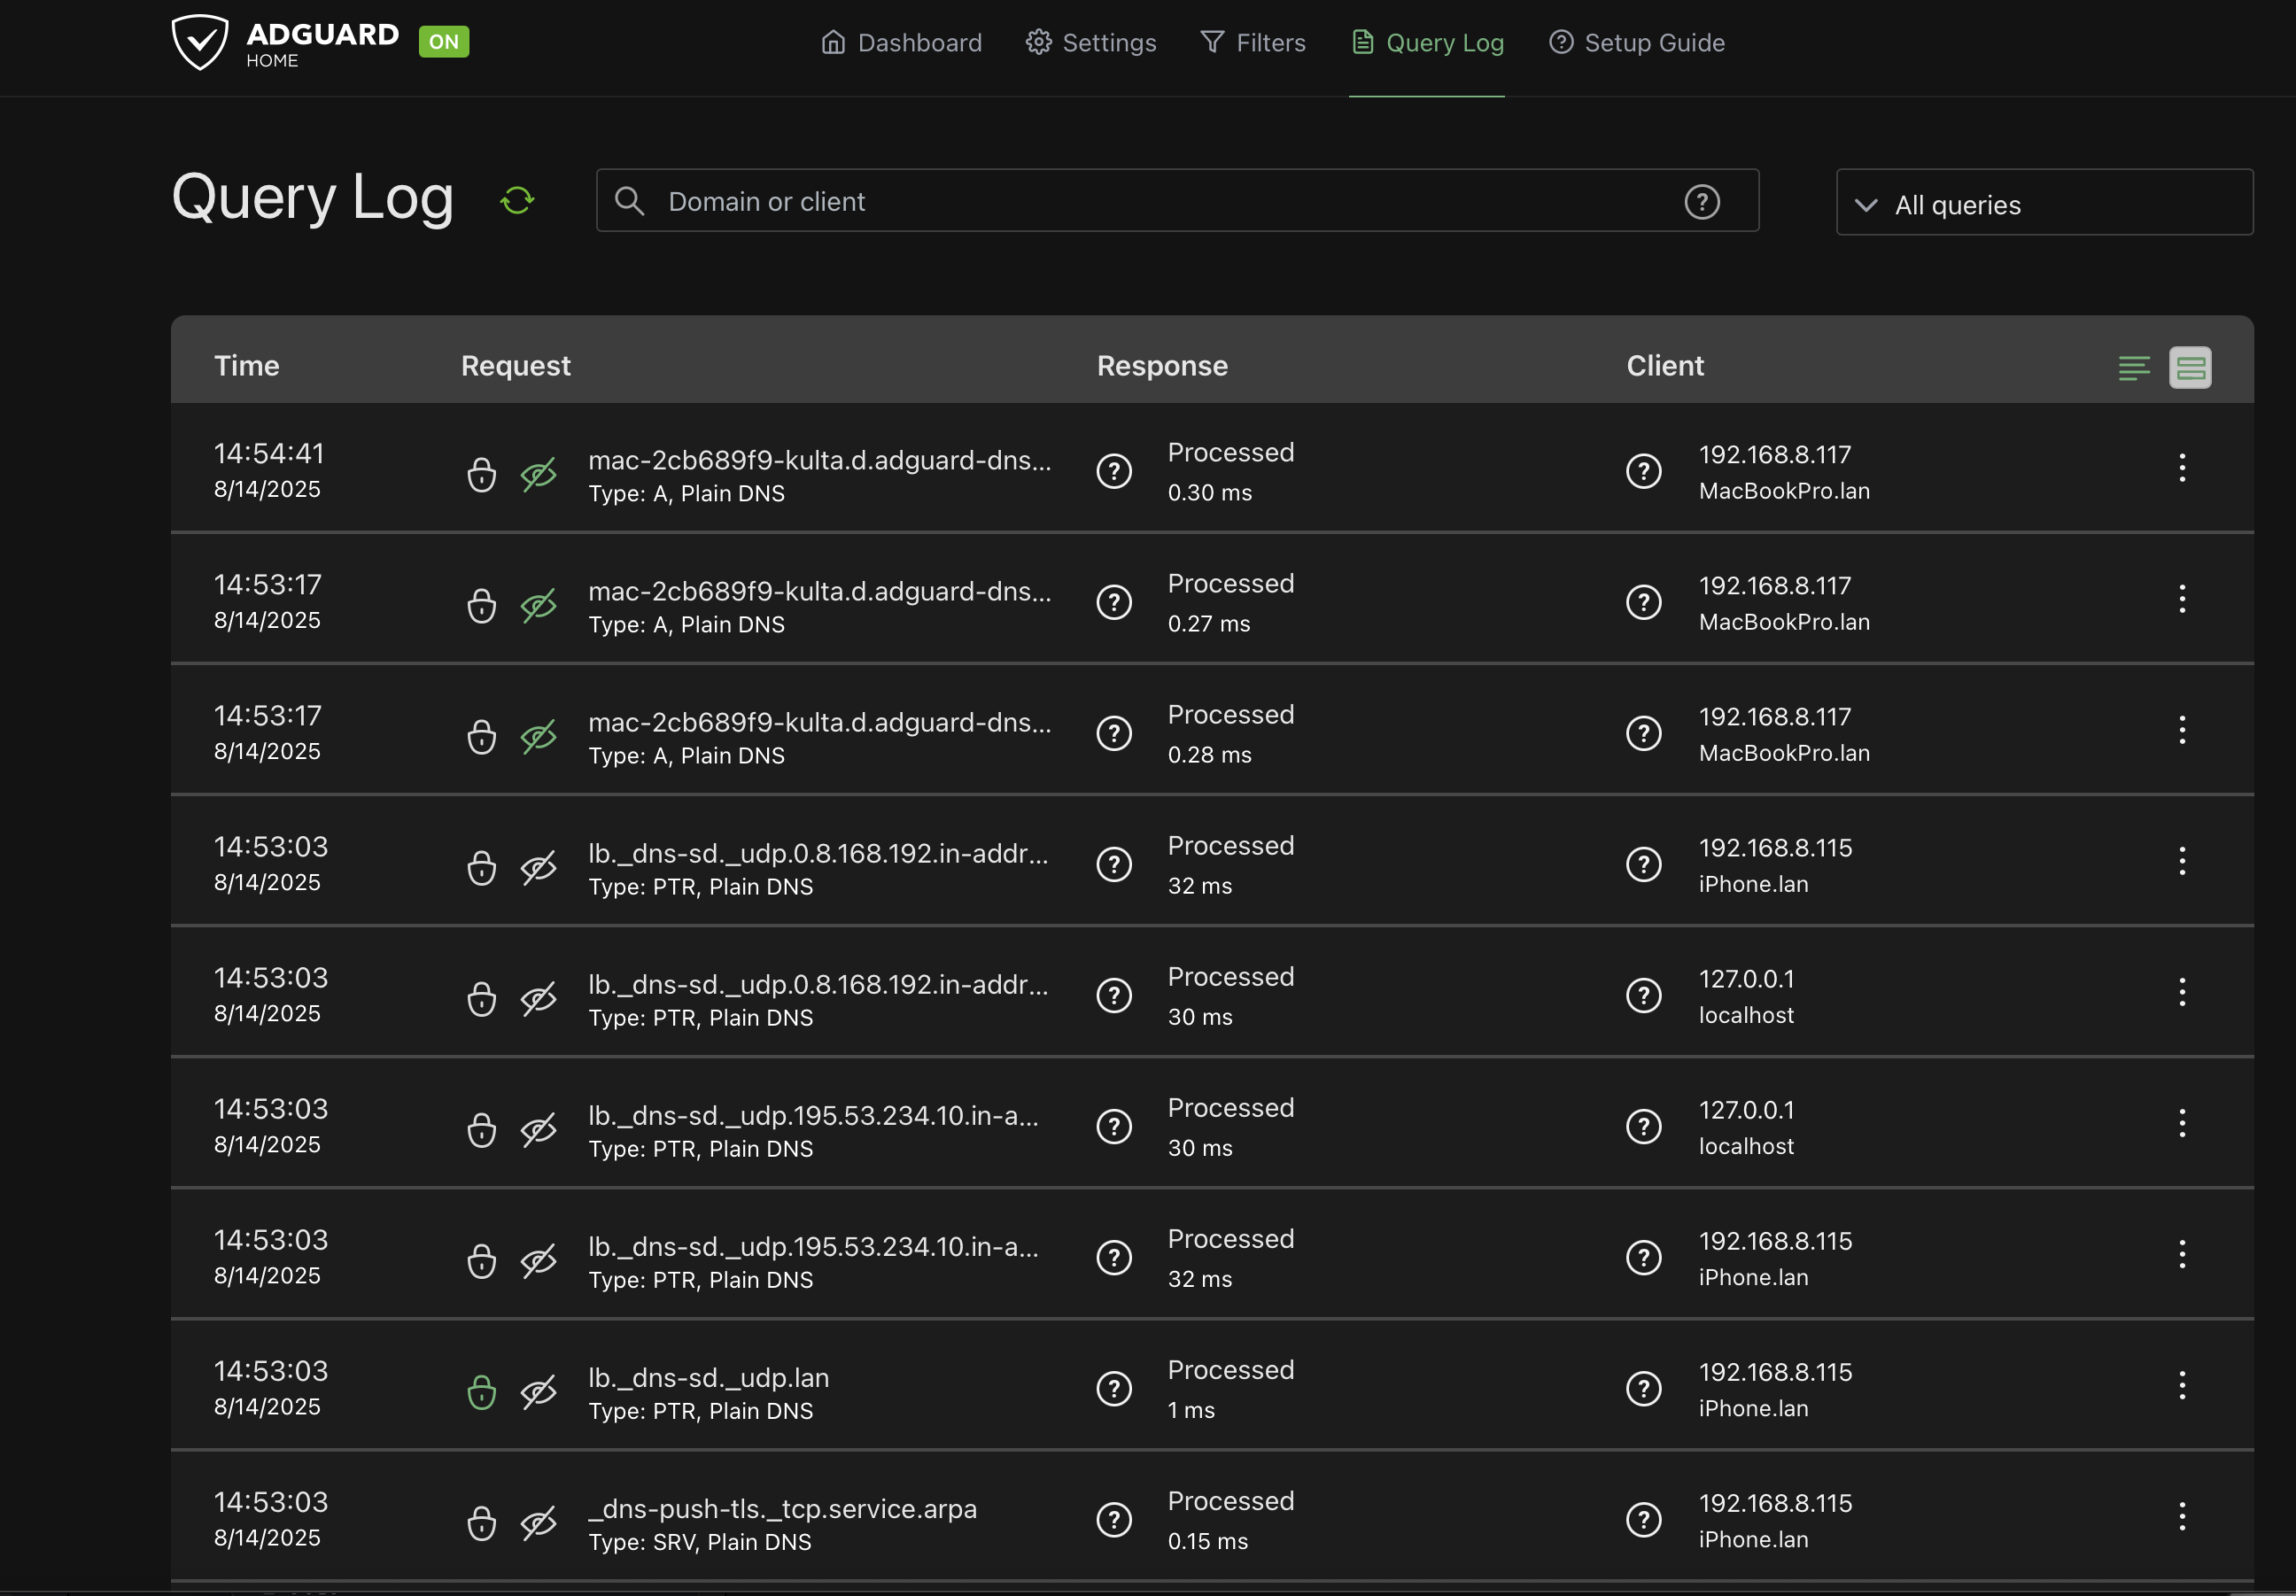
Finally, you will be able to see all the queries in the 'Query Log' in the AdGuard Home Settings Page (where we configured the DNS and filters etc. - it is the last tab).
BTW, whenever you make changes to the DNS, reverse DNS etc., it is good to also renew the DHCP lease of your WiFi connection. Rebooting the router will ensure it disconnect and reconnects, which is great. Otherwise, just turn off the WiFi and turn it back on and it should do the same thing.
Okay, I am bushed and need my coffee after all this typing. If you find any errors, please comment and I am happy to correct them.