How to Import the Profile into the Router
Step 1: Open the WireGuard Client page
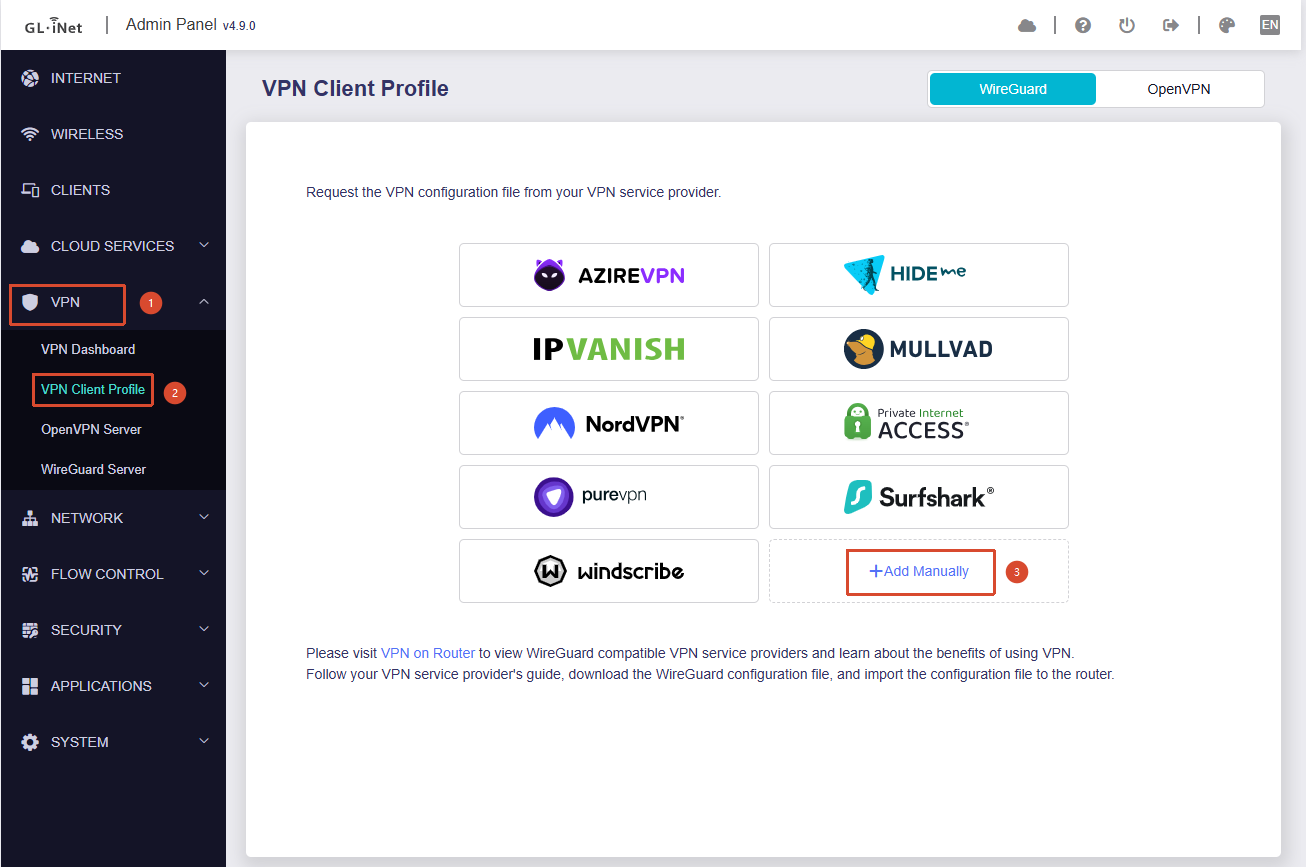
For firmware v4.9:
Go to:
Admin Panel -> VPN -> VPN Client Profile
Then click Add Manually.
For firmware v4.8:
Go to:
Admin Panel -> VPN -> WireGuard Client
and add a manual WireGuard profile group.
You can refer to this guide:
Step 2: Import or paste the WireGuard configuration
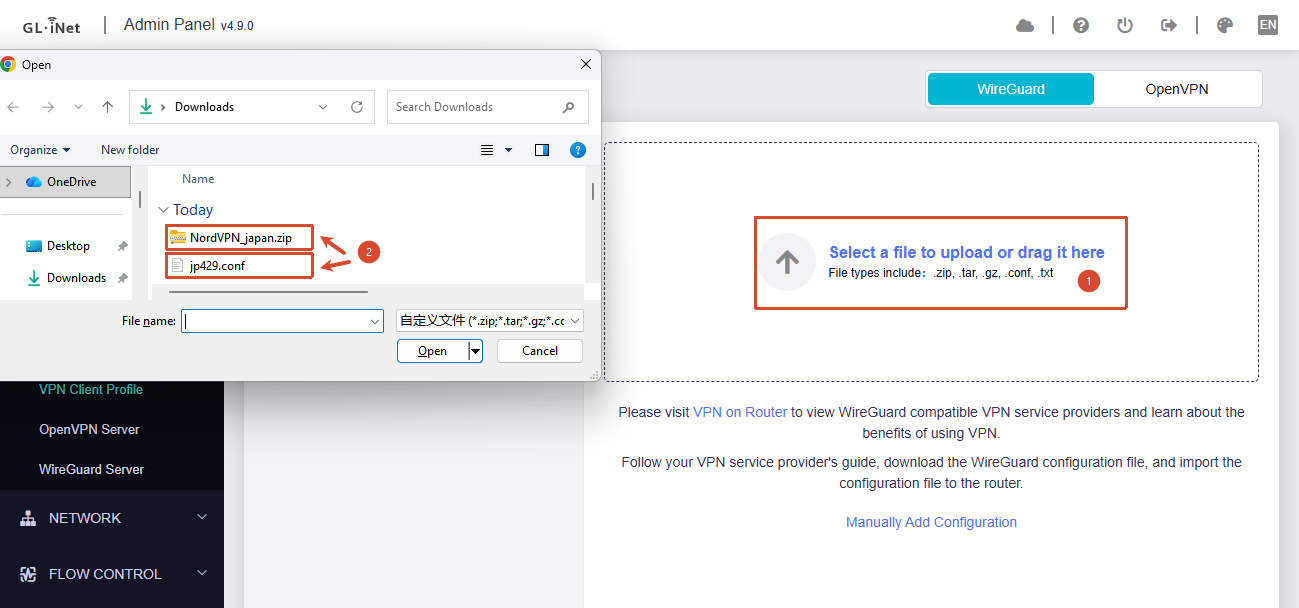
If you used Method 1
Click Select a file to upload or drag it here.
Upload the NordVPN WireGuard .conf file downloaded earlier.
If you clicked Download All, you can also upload the ZIP archive.
If you used Method 2
Click Manually Add Configuration.
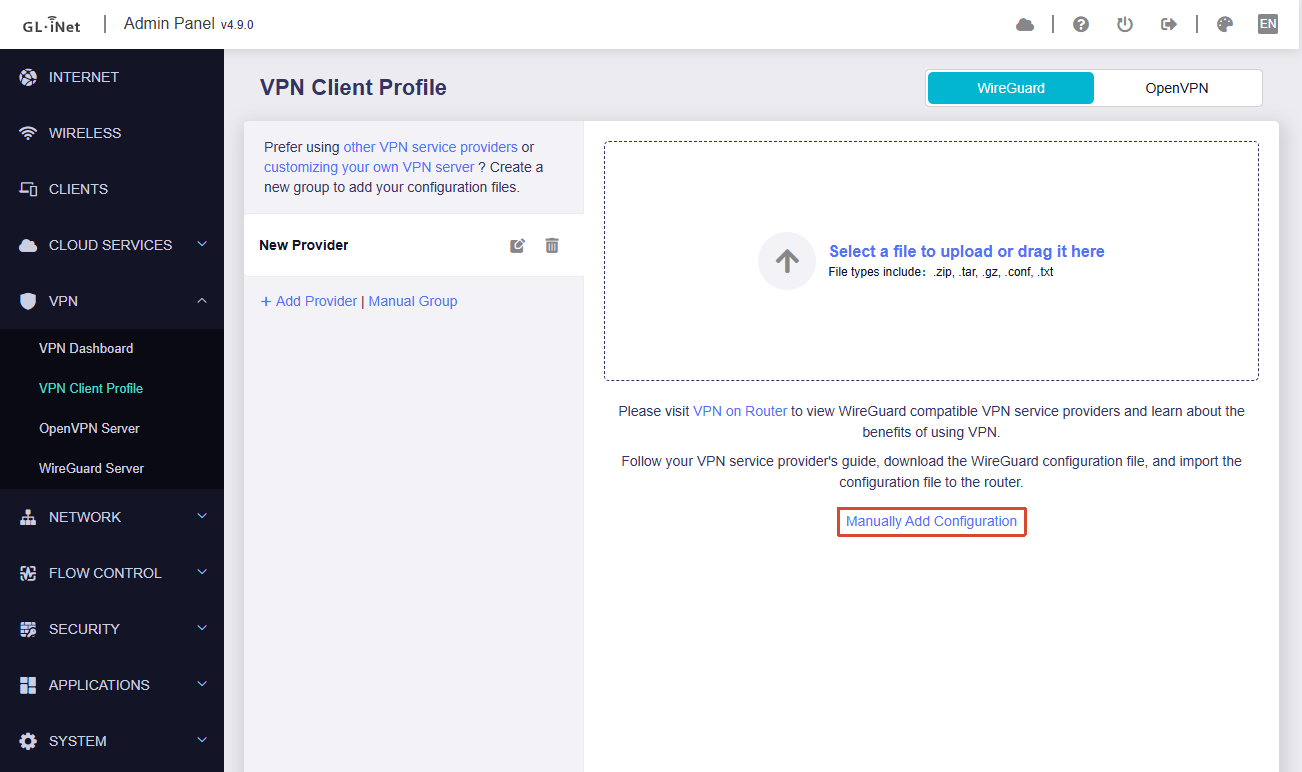
Paste the WireGuard configuration copied from:
wg showconf nordvpnlite
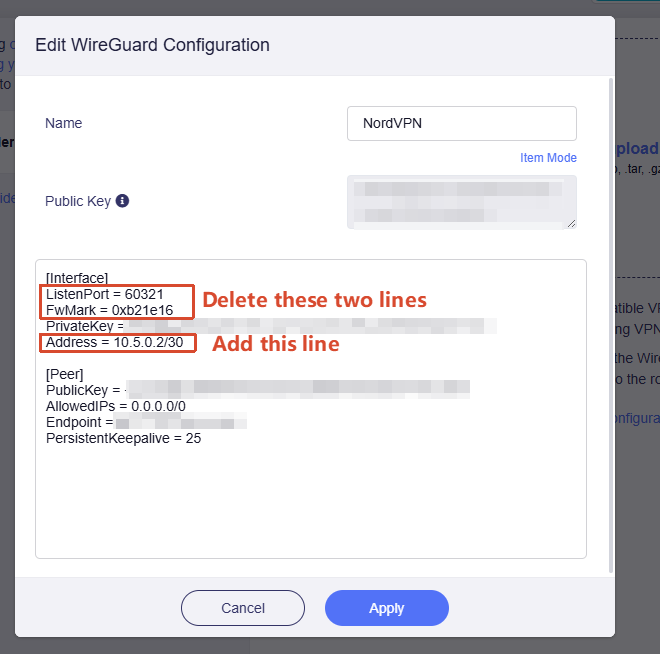
Before saving it, please edit the configuration:
- Remove the following lines:
ListenPort
FwMark
- Add an
Address =line under the[Interface]section.
The address should be the interface IP obtained from:
ip -br a show nordvpnlite
Example format:
[Interface]
PrivateKey = xxxxxxxxxxxxxxxxxxxxxxxxxxxxxxxxxxxxxxxxxxx
Address = 10.x.x.x/xx
Step 3: Enable the VPN profile
After the profile is imported or added manually, sinply enable it from the VPN Client page.
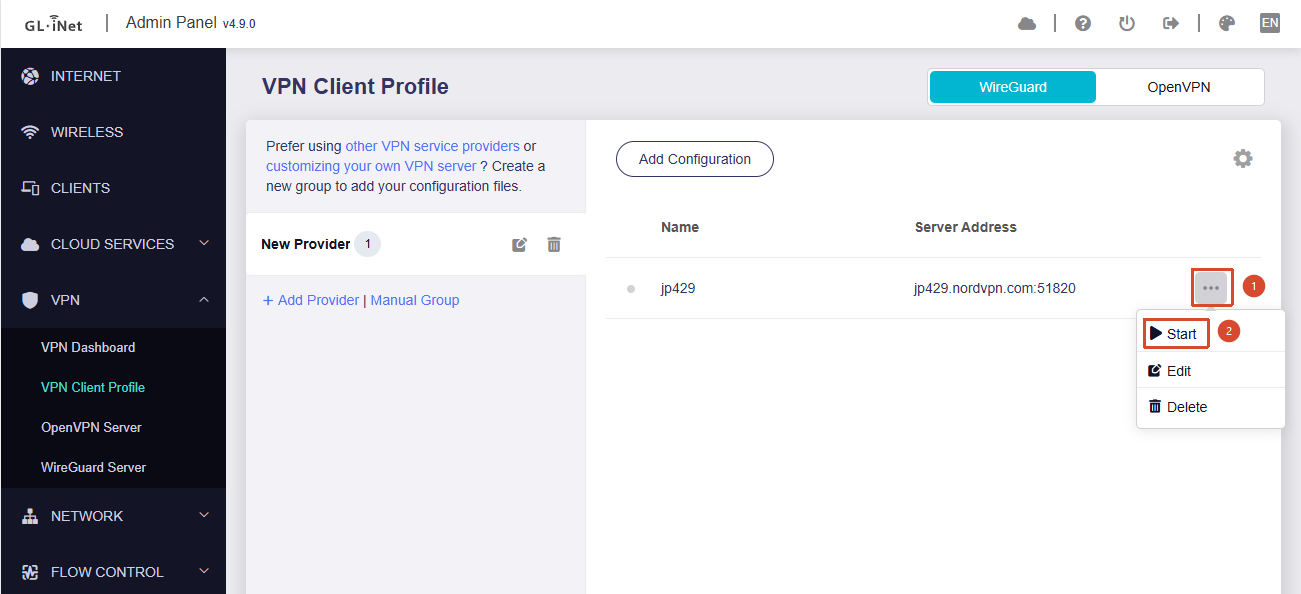
The router should now connect to NordVPN using the imported WireGuard profile.
Notes
- Method 1 is simpler and recommended for most users.
- Method 2 uses the official NordVPN Lite client, but only works on supported architectures.
- Method 2 may interrupt remote access, so please use it only when local access is available.
- If one server profile does not connect, try generating or downloading another country/server profile.
- If your NordVPN token is changed or regenerated, you may need to repeat the steps above.
References
GL.iNet NordVPN setup guide:
GL.iNet WireGuard Client manual setup guide:
NordVPN Lite setup guide:
NordVPN WireGuard Config Generator project: