Background
Recently, NordVPN changed the availability of one of the APIs used by GL.iNet routers to retrieve WireGuard profiles. As a result, newly generated NordVPN tokens may no longer work properly with the existing method.
Our R&D team is working hard to communicate with NordVPN to restore API availability as soon as possible.
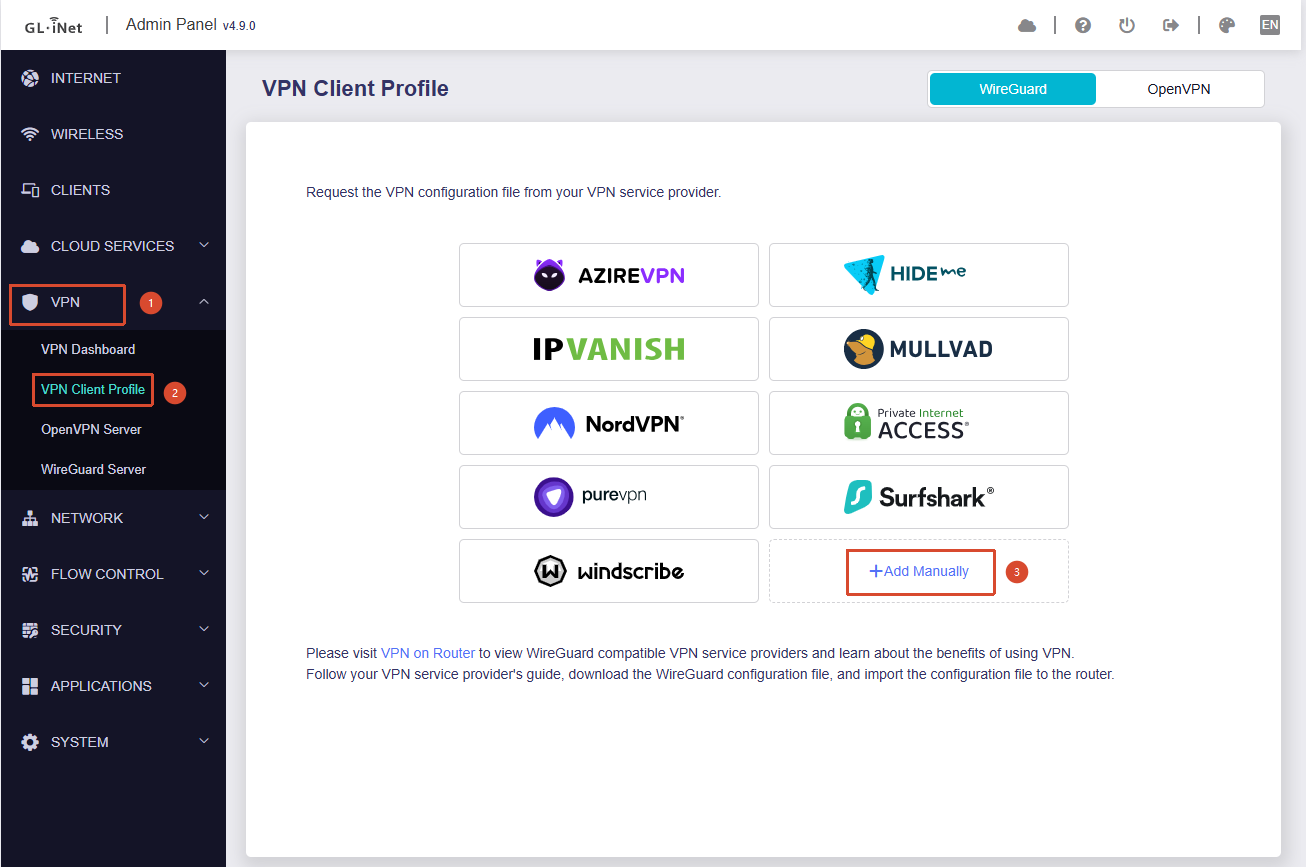
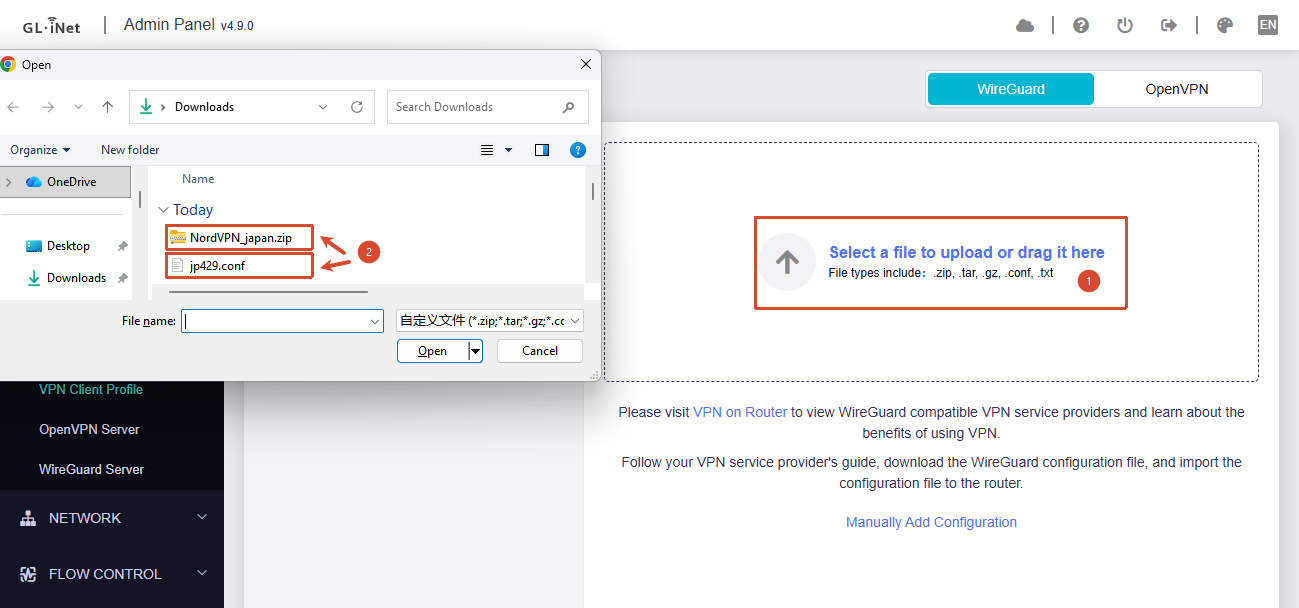
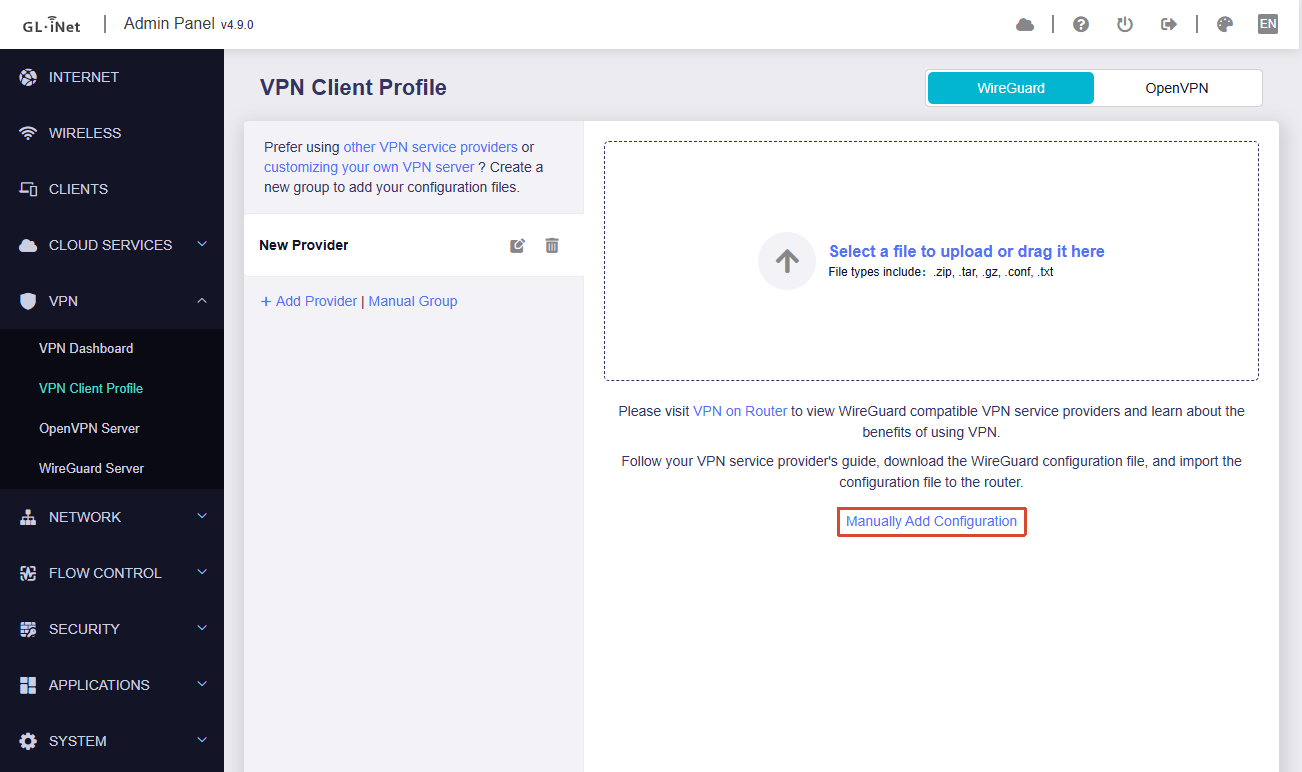
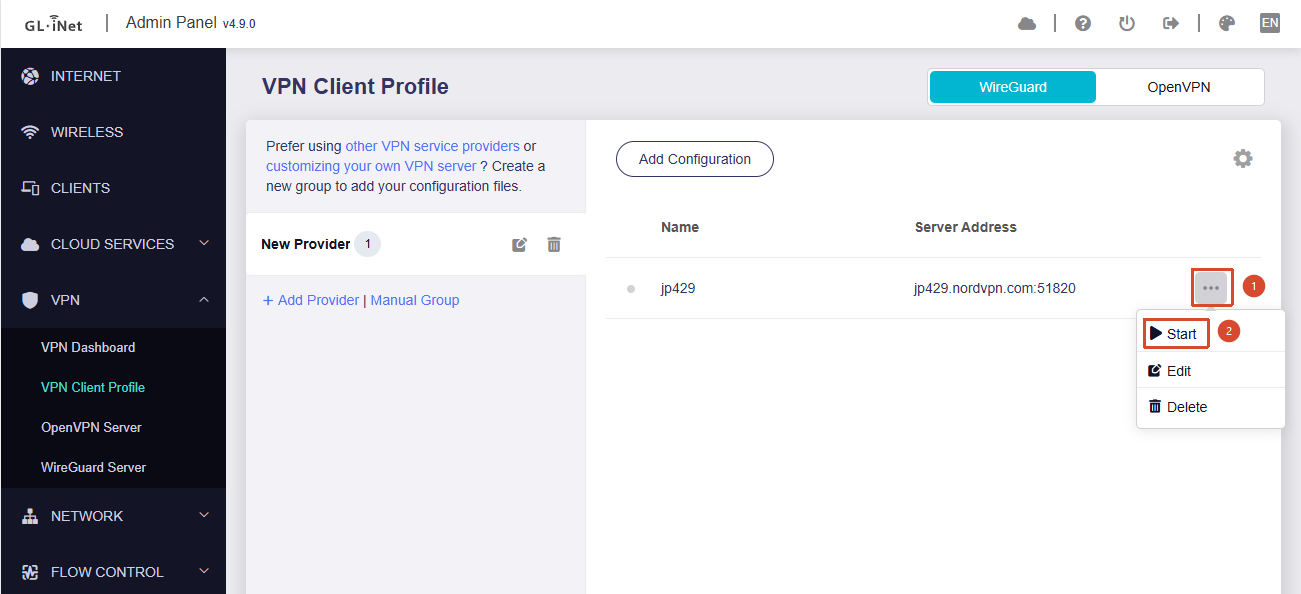
This tutorial provides alternative ways to obtain NordVPN WireGuard configuration files, so that they can be manually imported into GL.iNet routers and used with the WireGuard Client.
Prerequisites
Before following this guide, please obtain your NordVPN token first.
You can refer to Step 1 of the following GL.iNet guide:
Method 1: Use a Third-Party NordVPN WireGuard Configuration Generator
This is the easier method. It allows you to generate NordVPN WireGuard configuration files from a web page and then import them into the router.
Note:
The websites below are third-party tools and are not officially maintained by GL.iNet or NordVPN.
Please use them at your own discretion. You will need to enter your NordVPN token on the website.
Step 1: Open a NordVPN WireGuard configuration generator
You can use either of the following websites:
-
Deployed by @admon:
https://nordvpn-config.admon.me/ -
Deployed by the GitHub project author:
https://nord-configs-crafter.pages.dev/
Project GitHub page:
Step 2: Configure your NordVPN token
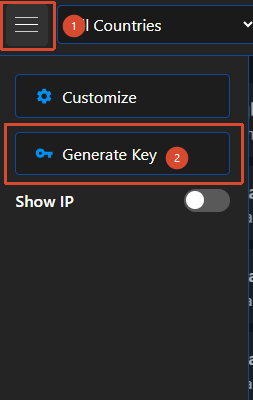
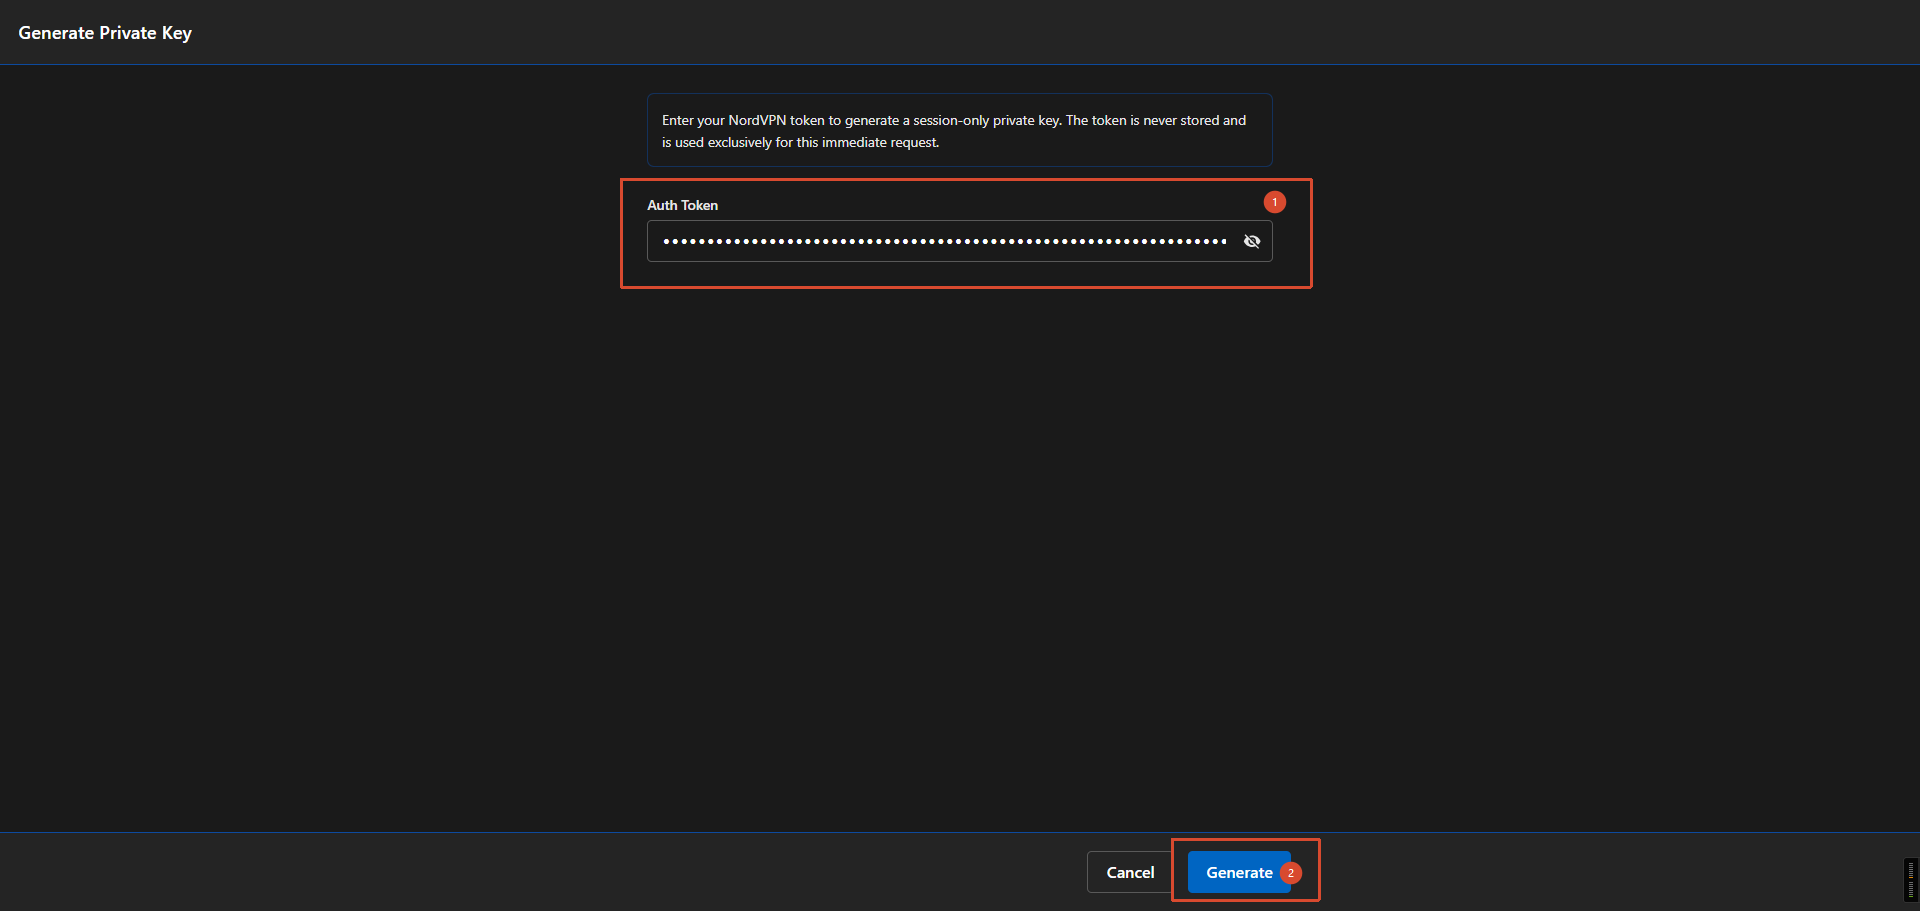
Open the sidebar and enter your NordVPN token.
Step 3: Download the WireGuard configuration files
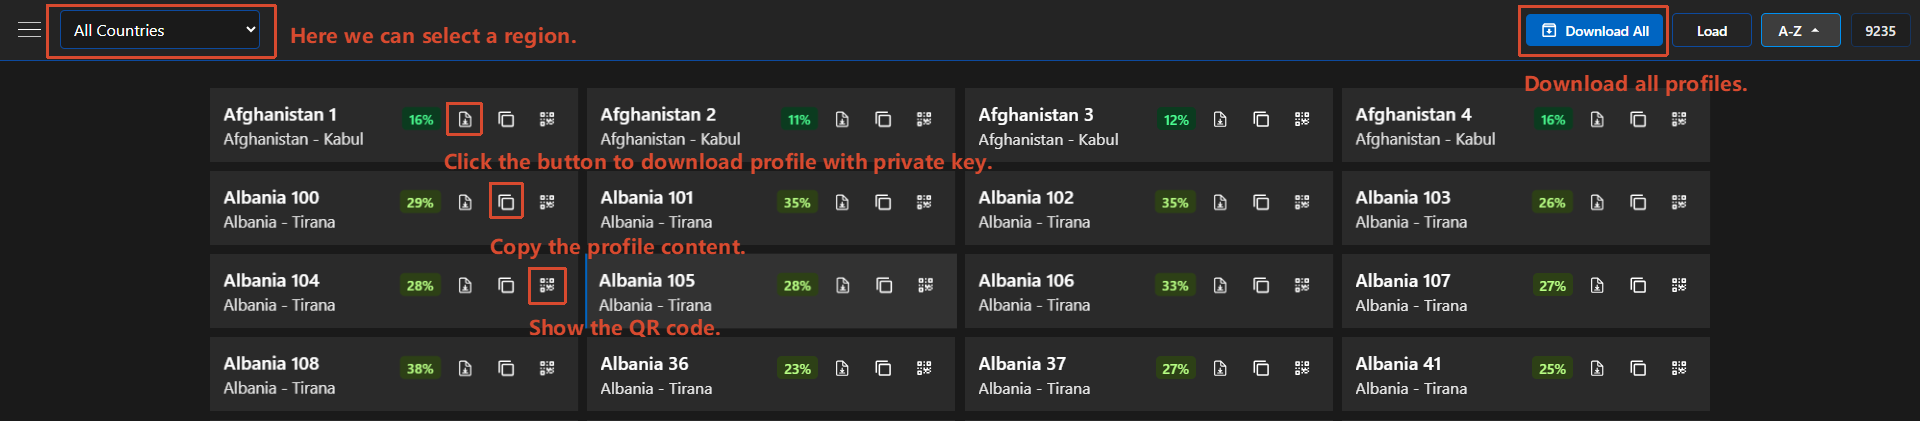
After the token is configured, the page will automatically return to the server list.
You can download the profile for a specific country, or download all profiles.
After downloading the .conf file or ZIP archive, you can import it into the router. See the import section below:
Method 2: Use the Official NordVPN Lite Client
This method uses the official NordVPN Lite client to generate the WireGuard configuration directly on the router.
Important:
This method may interrupt remote access to the router.
Please only use this method when you have local access to the router, or when you are sure you can reconnect to the device if the VPN connection changes the route.
Step 1: Check the router architecture
SSH into the router and run:
cat /etc/os-release | grep OPENWRT_ARCH
This method is supported only if the returned architecture is one of the following:
aarch64_cortex-a53
mipsel_24kc
Step 2: Download the correct NordVPN Lite package
Open the NordVPN Lite download page:
https://downloads.nordcdn.com/nordvpnlite/
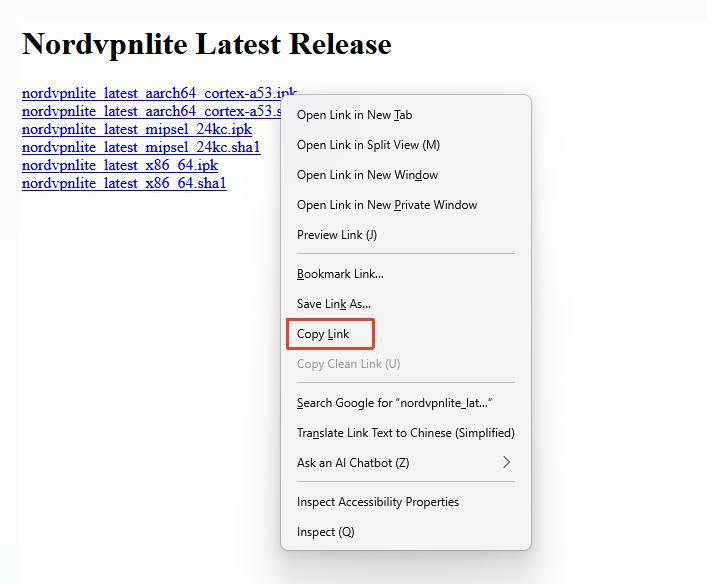
For aarch64_cortex-a53, use:
https://downloads.nordcdn.com/nordvpnlite/latest/nordvpnlite_latest_aarch64_cortex-a53.ipk
For mipsel_24kc, use:
https://downloads.nordcdn.com/nordvpnlite/latest/nordvpnlite_latest_mipsel_24kc.ipk
Step 3: Install the NordVPN Lite package
For aarch64_cortex-a53:
wget https://downloads.nordcdn.com/nordvpnlite/latest/nordvpnlite_latest_aarch64_cortex-a53.ipk
opkg install nordvpnlite_latest_aarch64_cortex-a53.ipk
For mipsel_24kc:
wget https://downloads.nordcdn.com/nordvpnlite/latest/nordvpnlite_latest_mipsel_24kc.ipk
opkg install nordvpnlite_latest_mipsel_24kc.ipk
Step 4: Configure the NordVPN token
Run the following command:
sed -i.bak 's|"authentication_token": "[^"]*"|"authentication_token": "YOUR_ACTUAL_TOKEN_HERE"|' /etc/nordvpnlite/config.json
Please replace YOUR_ACTUAL_TOKEN_HERE with your actual NordVPN token.
Step 5: Optional: specify a country
By default, the NordVPN Lite client will use a recommended server.
If you want to generate a configuration for a specific country, you can modify the vpn field.
For example, to use Germany:
sed -i 's/"vpn": "recommended"/"vpn": { "country": "de" }/' /etc/nordvpnlite/config.json
You can replace de with the country code you want to use.
Step 6: Start NordVPN Lite
Run:
nordvpnlite start
The official NordVPN Lite client will select a VPN server and create the WireGuard interface.
Step 7: Display the generated WireGuard configuration
Run:
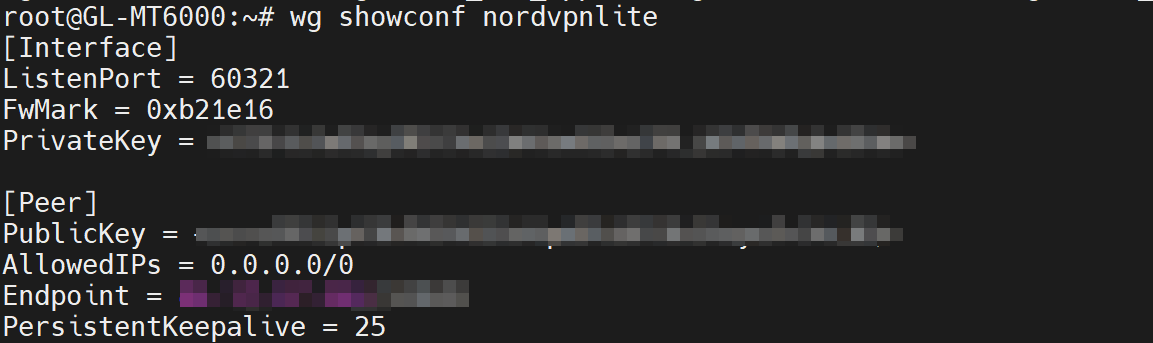
wg showconf nordvpnlite
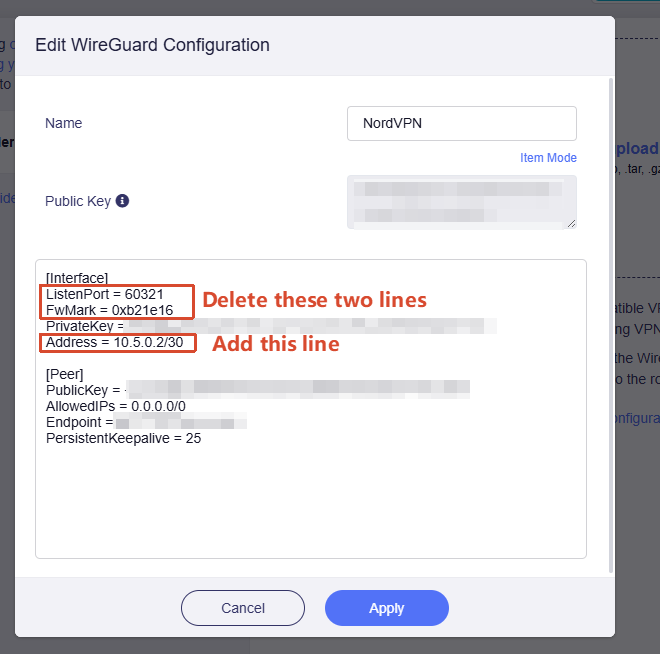
Copy the output. You will need it when manually adding the WireGuard profile later.
Step 8: Check the WireGuard interface IP address
Run:
ip -br a show nordvpnlite
Write down the IP address shown in the output. You will need to add it as the Address field in the WireGuard configuration.

Step 9: Stop NordVPN Lite
After copying the configuration and interface address, stop the NordVPN Lite client:
nordvpnlite stop