Background
GL.iNet routers integrate encrypted DNS functionality to protect users from privacy leaks and DNS hijacking.
This tutorial provides guidance on manually adding and configuring custom DNS over TLS (DoT) and DNS over HTTPS (DoH) servers via SSH.
It is specifically designed for users who need to integrate paid DNS services (such as NextDNS) or self-hosted DNS solutions (such as AdGuard Home).
Important Note / Disclaimer:
The configuration outlined in this tutorial involves manual modification of system files via SSH.
- No Official Support: This functionality is not officially supported by GL.iNet at this time. Our customer service and technical support teams are unable to assist with troubleshooting issues related to these specific modifications.
- Advanced Users Only: This guide is intended for users familiar with command-line interfaces (CLI) and SSH. Incorrect changes to system files may cause network instability or require a firmware reset. We recommend creating a backup file via Luci before proceeding.
- Future Updates: Firmware upgrades may overwrite these settings or change how the underlying services function.
Verified Devices & Firmware Compatibility
This method has been specifically tested and verified on the devices listed below. However, generally speaking, any GL.iNet router running firmware version 4.8.x should be compatible with this method.
- Flint 3 (GL-BE9300): v4.8.3
- Flint 2 (GL-MT6000): v4.8.3
- Slate 7 (GL-BE3600): v4.8.1
- Beryl AX (GL-MT3000): v4.8.1
Prerequisites
Before proceeding, please ensure you meet the following requirements:
- SSH Access: You know how to SSH into your router (using PuTTY, Terminal, or PowerShell).
- CLI Familiarity: You are comfortable with basic command-line operations and text editors in a UNIX-like environment.
Part 1: Manually Configure DoT (DNS over TLS)
This method uses the stubby resolver. You will first clear the existing configuration and then add your custom server details.
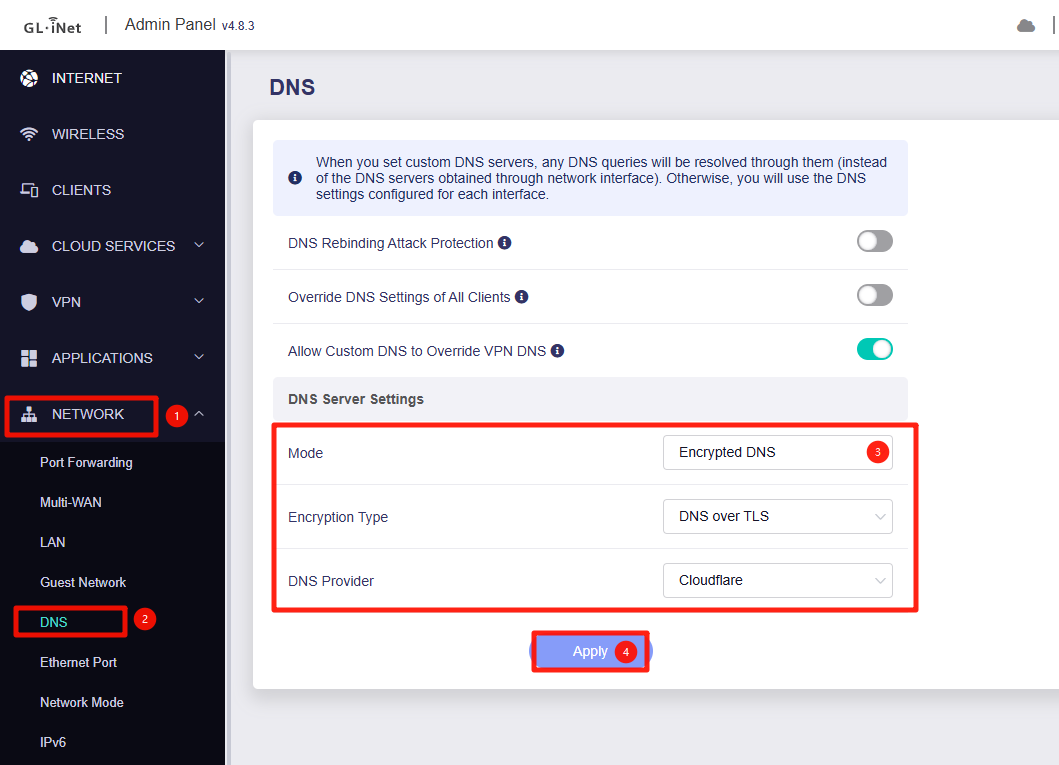
1. Prepare the Router UI
- Open the GL.iNet Admin Panel.
- Navigate to Network -> DNS.
- Change DNS Mode to "Encrypted DNS".
- Set Encryption Type to "DNS over TLS".
- Select any provider from the list (this initializes the service so we can modify it).
2. Clear Existing Stubby Config: SSH into your router and run the following command block to remove the current resolver settings:
while uci -q delete stubby.@resolver[0]; do :; done
uci commit stubby
3. Add Custom DoT Servers: Run the commands below.
Note: The example below uses Quad9. Replace the IP addresses and
tls_auth_namewith your specific provider's details.
# Add Primary Server (IPv4)
uci add stubby resolver
uci set stubby.@resolver[-1].address='9.9.9.9'
uci set stubby.@resolver[-1].tls_port='853'
uci set stubby.@resolver[-1].tls_auth_name='dns.quad9.net'

# Add Backup Server (IPv4)
uci add stubby resolver
uci set stubby.@resolver[-1].address='149.112.112.112'
uci set stubby.@resolver[-1].tls_port='853'
uci set stubby.@resolver[-1].tls_auth_name='dns.quad9.net'

# (Optional) Add IPv6 Server
uci add stubby resolver
uci set stubby.@resolver[-1].address='2620:fe::fe'
uci set stubby.@resolver[-1].tls_port='853'
uci set stubby.@resolver[-1].tls_auth_name='dns.quad9.net'

# Commit changes and restart services
uci commit stubby
/etc/init.d/stubby restart
/etc/init.d/dnsmasq restart
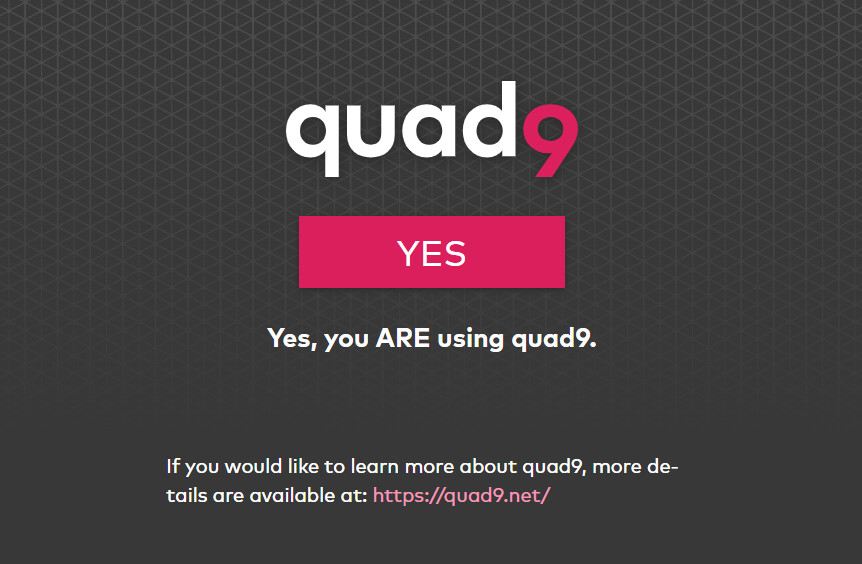
4. Verify Configuration
Your DNS requests are now protected by DoT and transmitted securely to the Quad9 server.
Part 2: Manually Configure DoH (DNS over HTTPS)
This method modifies the dnscrypt-proxy2 configuration. You will need a DNS Stamp for your provider.
1. Generate Your DNS Stamp
If your provider does not supply a pre-made stamp (a string starting with sdns://), you must generate one manually. This is common for self-hosted instances like AdGuard Home or Pi-hole.
Reference Guide: For a comprehensive walkthrough, we recommend following the AdGuard Knowledge Base: How to create your own DNS stamp.
Quick Steps:
- Go to the DNS Stamp Calculator.
- Select DNS-over-HTTPS (DoH) from the protocol dropdown.
- Fill in the required fields:
- IP Address: The IP address of your server (e.g.,
1.2.3.4). - Host Name: The server name used for TLS verification (e.g.,
dns.example.com). - Hashes: The SHA256 hash of your server's SSL certificate.
- Note: This is critical if you are using a self-signed certificate. If using a valid public certificate (like Let's Encrypt), this is optional but recommended for security pinning.
- Path: The URL path for DoH requests (usually
/dns-query).
- Copy the generated string starting with
sdns://.
Tip: Ensure you have the correct IP address and Hash for your provider. If these do not match the server's actual configuration, the connection will fail validation.
2. Edit the Configuration File: SSH into the router and open the configuration file:
vi /etc/dnscrypt-proxy2/dnscrypt-proxy.toml
3. Add Your Custom Server: Find the section labeled [static]. Add your custom server entry below it.
Important: TOML files are sensitive to indentation. Ensure your indentation matches the existing file structure.
[static]

# Example 1: NextDNS

  [static.'NextDNS-Paid']
  stamp = 'sdns://xxxxxxxxx'

# Example 2: Your Custom Server
  # specific_name can be anything, but must be unique

  [static.'myserver']
  stamp = 'YOUR_GENERATED_SDNS_STAMP_HERE'
4. Restart Services: Apply the changes by restarting the proxy and DNS masquerade services:
/etc/init.d/dnscrypt-proxy restart
/etc/init.d/dnsmasq restart
5. Configure:
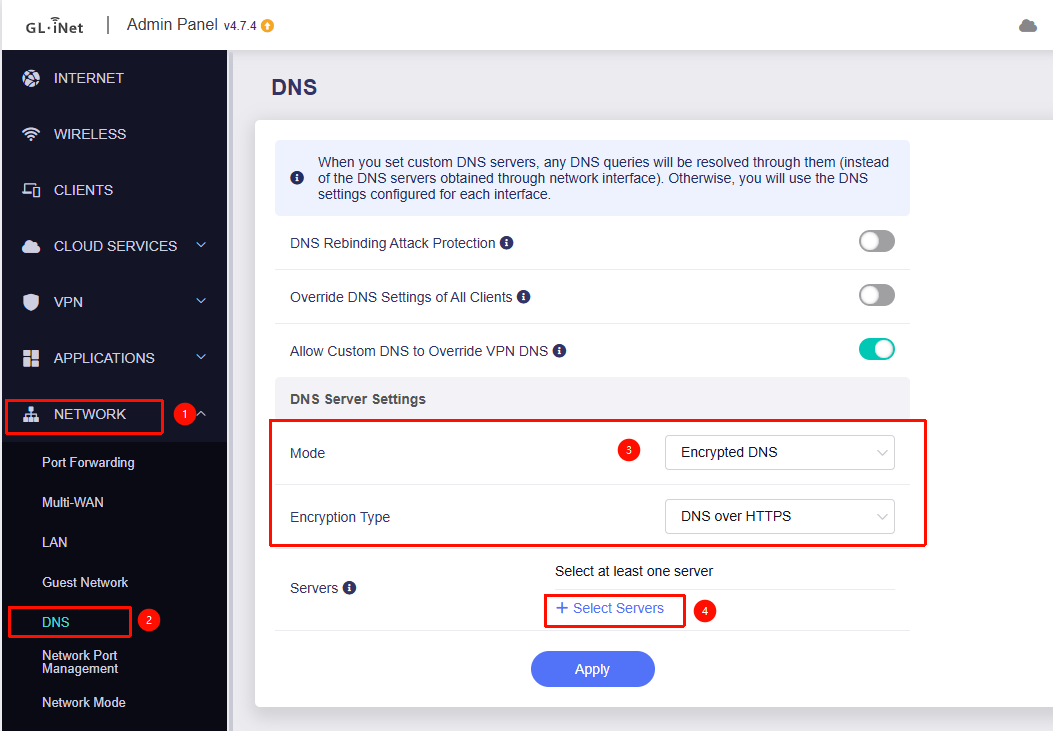
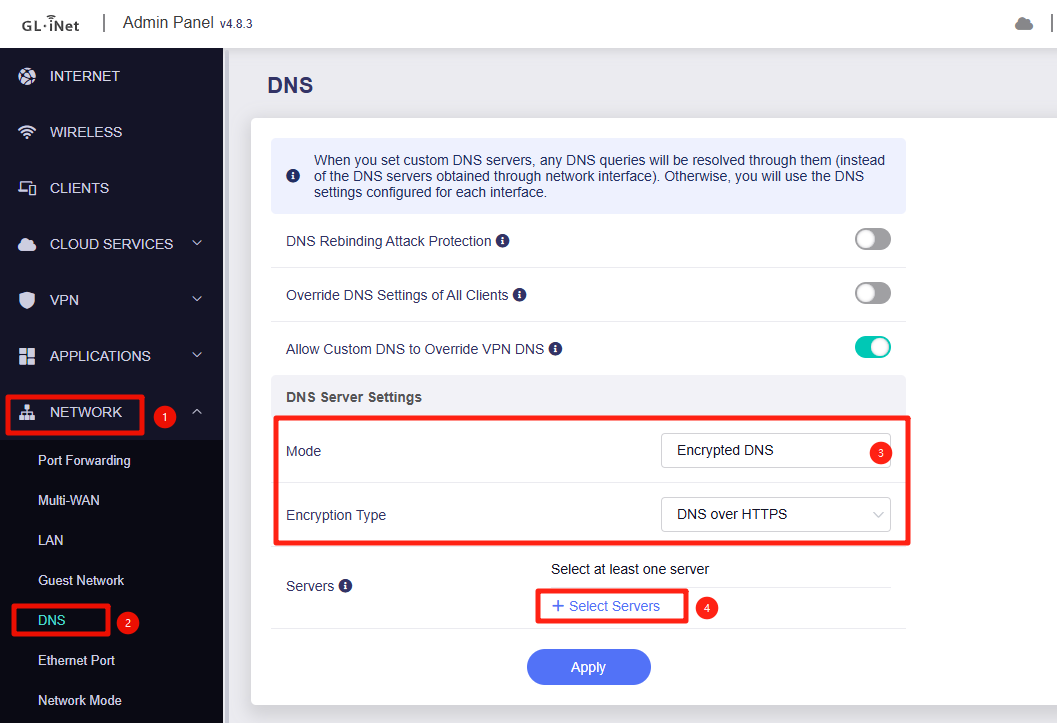
- Open the GL.iNet Admin Panel and navigate to Network -> DNS.
- Change DNS Mode to "Encrypted DNS".
- Set Encryption Type to "DNS over HTTPS".
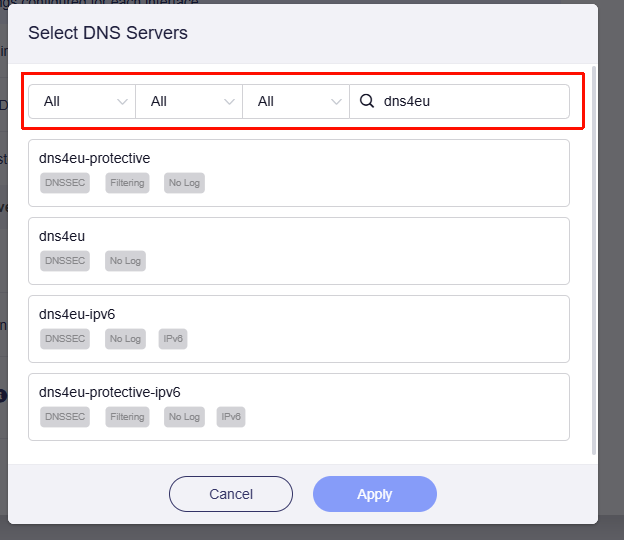
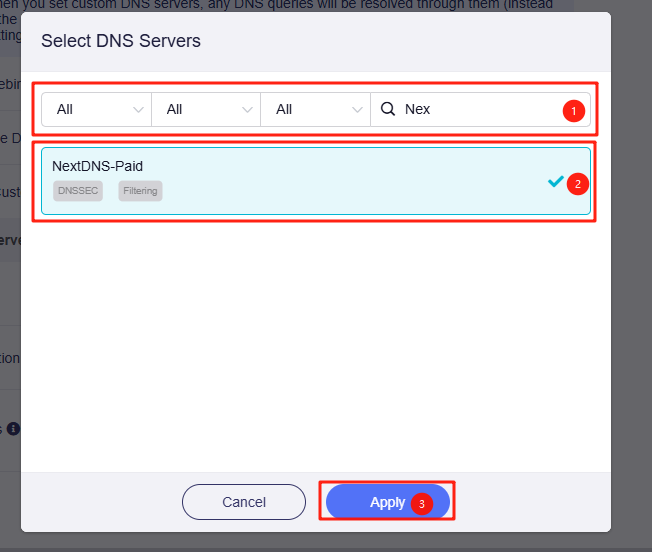
- Click Select Servers.
- Select the appropriate filter based on the configured label, and choose by the configured name.
- Click Apply to save the settings.
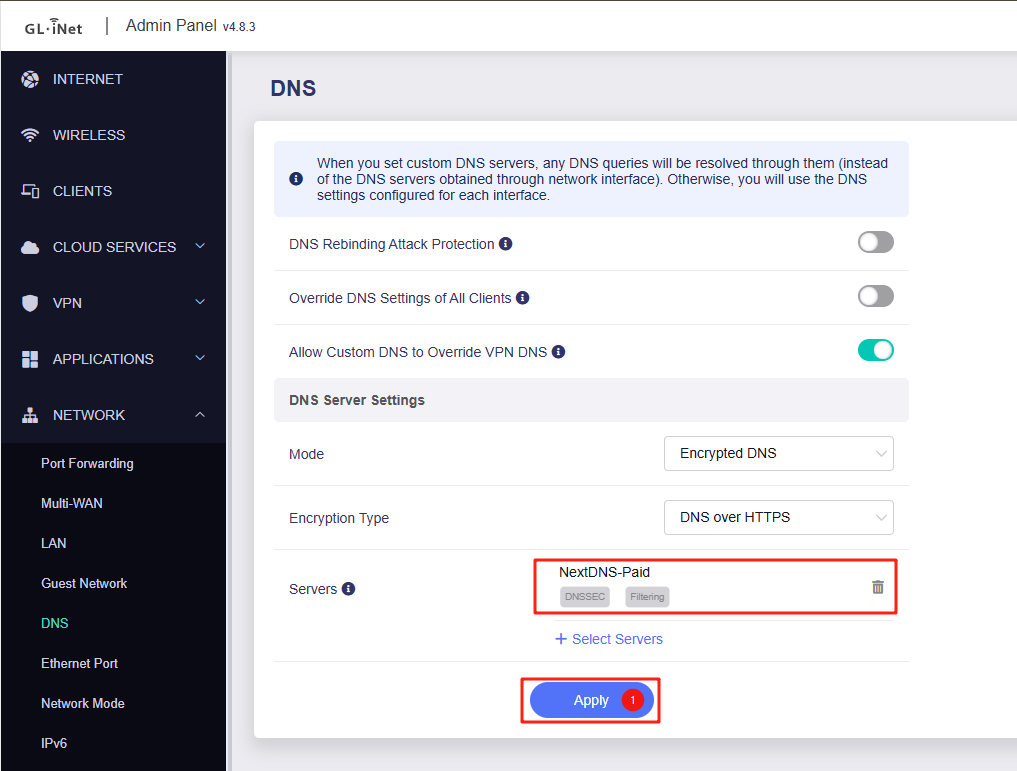
6. Verify Configuration

Part 3: Persisting Changes (Firmware Upgrades)
To ensure your custom configurations survive a firmware upgrade, follow these steps based on the method you used.
For DoT (UCI Configuration): Since DoT settings are managed via the standard UCI system, you only need to check "Keep Settings" when performing a firmware upgrade via the GL.iNet Admin Panel. No extra steps are required.
For DoH (File-based Configuration): Because DoH requires modifying a system file manually, you must explicitly tell the router to back up this specific file during upgrades.
1. Add file to backup list: Run the following command via SSH:
echo "/etc/dnscrypt-proxy2/dnscrypt-proxy.toml" >> /etc/sysupgrade.conf
2. (Optional) Remove persistence: If you no longer want to preserve this file in future upgrades, run this command to remove it from the backup list:
sed -i '/\/etc\/dnscrypt-proxy2\/dnscrypt-proxy.toml/d' /etc/sysupgrade.conf
Part 4: How to Revert Changes
If you encounter issues or wish to return to factory defaults, follow these recovery steps.
For DoT: Since DoT uses the standard configuration database:
- Go to the GL.iNet Admin Panel -> Network -> DNS.
- Simply change the DNS settings (e.g., switch back to "Automatic" or select a different standard provider).
- This will overwrite the manual UCI injections automatically.
For DoH: If you have edited the .toml file incorrectly and the service won't start, you can restore the original file from the router's read-only memory (ROM).
Run this command via SSH to reset the configuration:
cp -p /rom/etc/dnscrypt-proxy2/dnscrypt-proxy.toml /etc/dnscrypt-proxy2/dnscrypt-proxy.toml
After running this, you need to restart the service using
/etc/init.d/dnscrypt-proxy restart